# Address book
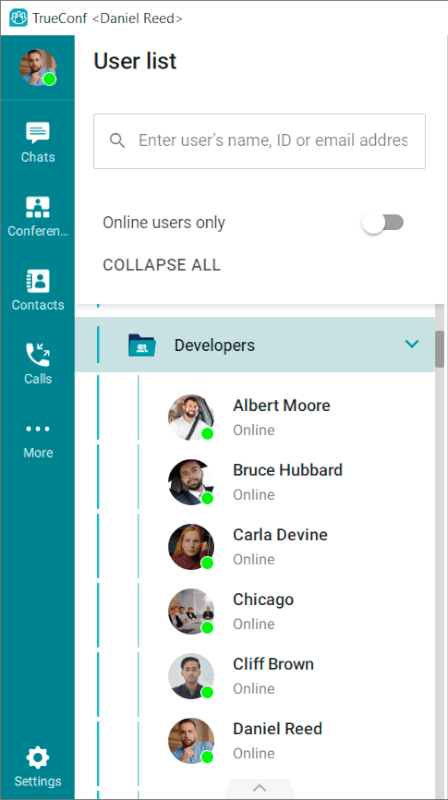
When you sign in, the pinned main menu and address book will be displayed in the left part of the window:
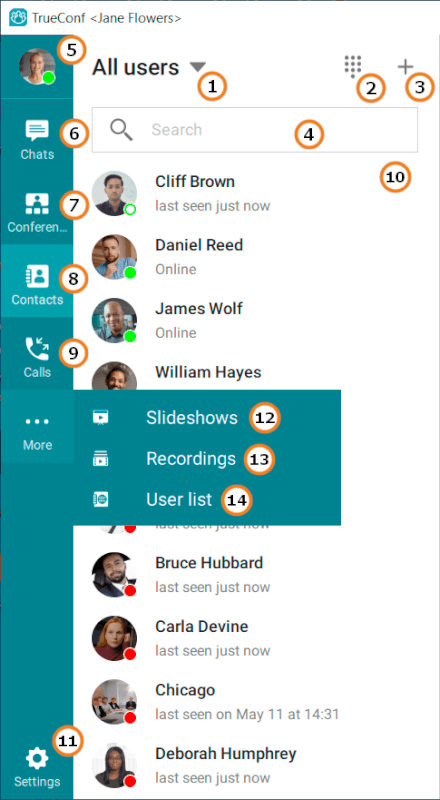
Address book
Call history
List of users and their statuses
You can change the width of the displayed contact list by dragging its right border. Similarly, you can change the size of other sections and panels displayed on the right side.
# User statuses
Each user in the address book is assigned with one of the following statuses:
 — Online
 — Online from a smartphone or tablet
 — Online from a hardware or software SIP/H.323 endpoint
 — Recently active: the network status for users who previously signed in to the mobile application, but are currently offline
 — Owner of an ongoing conference
 — Busy (in a video call or conference)
 — Away (away from keyboard for a certain time period, 15 minutes by default)
When the computer screen is blocked, the status is immediately set for the user who is signed in TrueConf client application. In this case, timeout settings for this status are ignored.
 — Do Not Disturb (can be set manually by a user)
 — Offline
 — Unknown (e.g., an account does not exist or is created on an external server which if not federated with your server instance. This status may also be assigned to an existing user on the same server which has not been yet added to the address book.)
# User Status Change Notification
The client application of TrueConf supports notifications for user status changes.
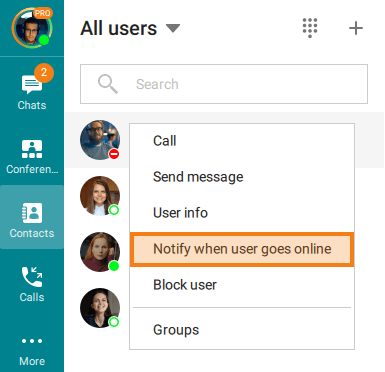
If you need to be promptly notified about the change to the Online status from any other:
In the address book, find the required user.
Right-click on the desired contact.
In the context menu that appears, press the Notify when user goes online button.
If you want to disable the notification before waiting for the desired contact to change status, right-click on it and select the Don't notify when user goes online option.
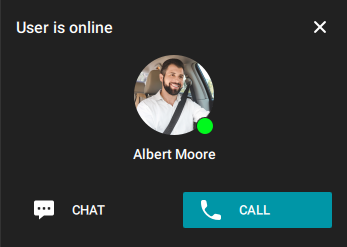
Once the user's status changes, you will receive a notification with an option to make a call or send a message.
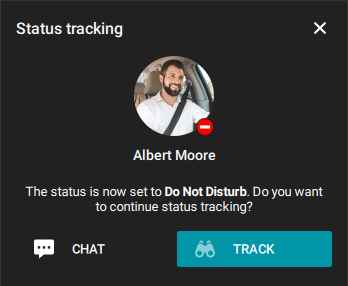
If you miss the notification and the status of the desired subscriber changes again, you will see a corresponding alert. You will be able to choose whether to continue monitoring the status, as well as to go to the chat:
The status change notification feature also works for user groups.
# Adding contacts
Enter user’s TrueConf ID in the search field and click  button.
Similarly, you can add third-party SIP/H.323 and RTSP devices to your address book by entering a call string in the appropriate format instead of TrueConf ID.
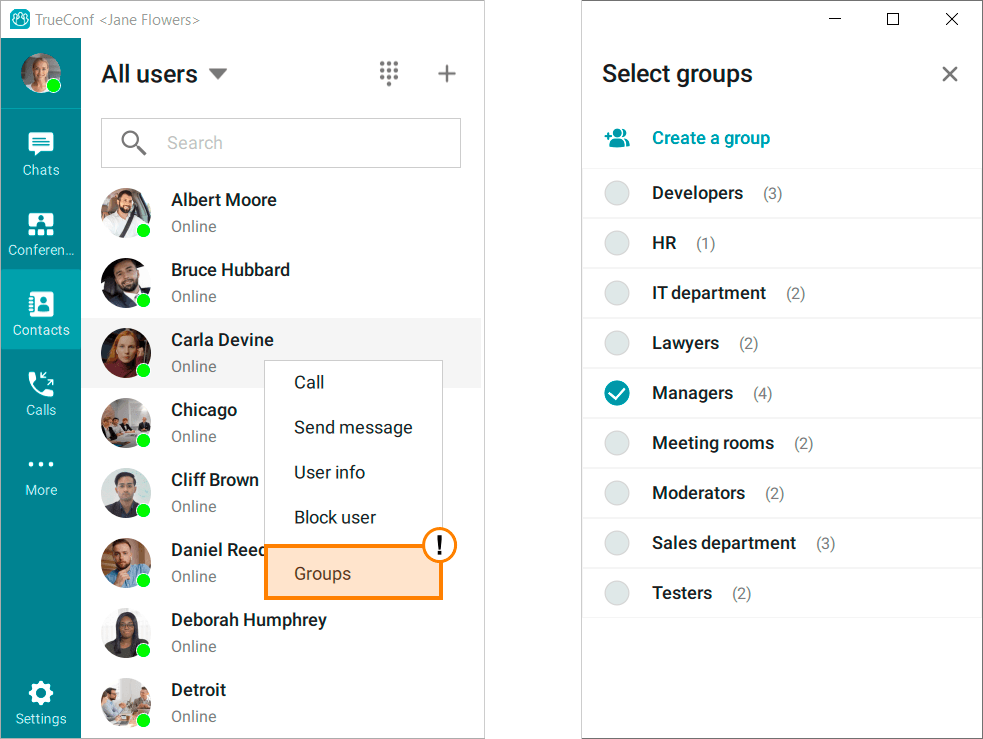
After that you can create a new group for this user or add the user to an existing group:
TrueConf Server administrator can add contacts to your address book and set group display automatically to save you from manual settings.
# Viewing and editing user profiles
To view a user profile, left-click on the user's name or select User info in the context menu.
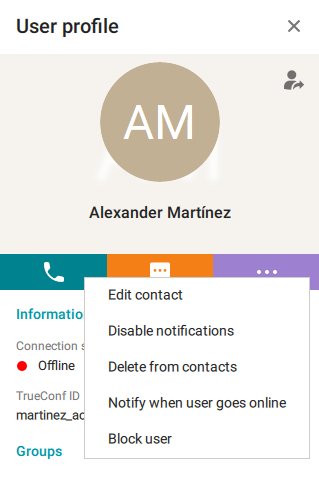
The following options are available in the user profile:
call the user or send a personal message
share a user contact;
quickly copy an individual profile item (phone number, TrueConf ID, etc.) using a separate button;
invoke the advanced settings menu, where you will find:
the ability to view/edit subscriber information;
the function to disable/enable notifications for incoming messages from a subscriber;
functions for deleting or blocking a subscriber;
set a notification for when the user's status changes to Online.
If a user has been added to your address book by your TrueConf Server administrator, you will not be able to delete or edit the user profile.
To share a contact, click  , select the recipient in the pop-up window and click on the Share button. You can also do it in the group chat window by clicking on the
  button.
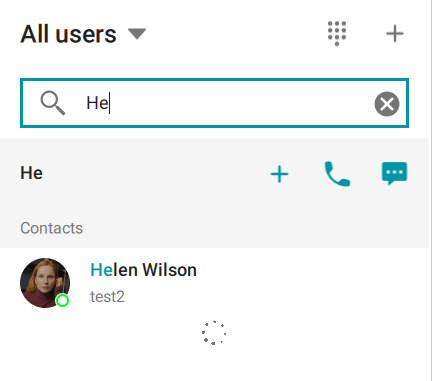
# Searching for users
Enter the user's TrueConf ID or the initial characters of his/her name in the search field above the address book. The application will filter the contact list according to your query and it will be easier for you to find the contact.
# Deleting users
Find the user or device by their display name in the address book, open context menu and click Delete from contacts.

You can only delete the address book contacts you've added manually.
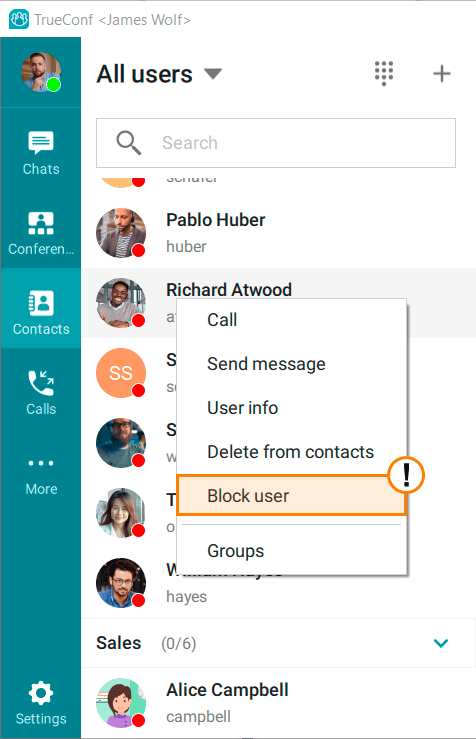
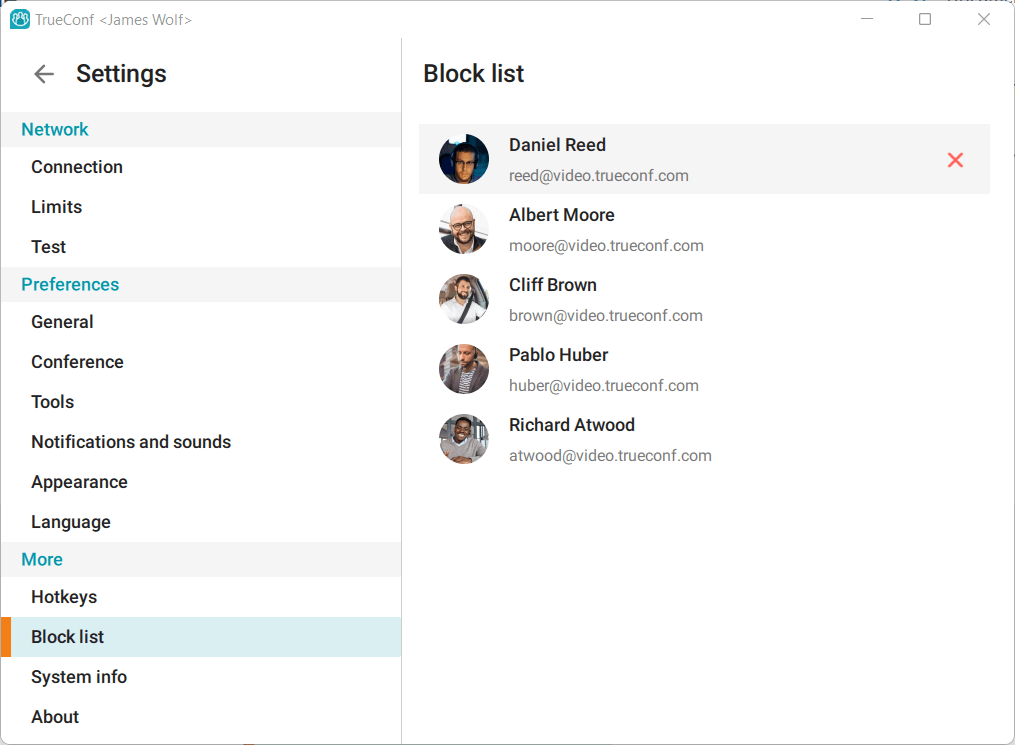
# Blocking users
You can block any user via the context menu.
Similarly, you can unblock users.
When a user is blocked, they will not be able to:
You can find the list of blocked users in the Settings → More → Block list section of your client application:
# Global user list
Click Global user's search in the main menu to view the list of users from federated TrueConf Server instances.
This menu item may be unavailable if if TrueConf Directory integration is not set up on your TrueConf Server instanceTrueConf Directory.
# Configuring your address book
# Setting up your address book view
Click the arrow ![]() above the search field to сhange the address book view. You can select the users you would like to be displayed: all/online/groups.
above the search field to сhange the address book view. You can select the users you would like to be displayed: all/online/groups.
In order to display only users from a certain group in the address book, click Show one group and select the necessary groups from the list.
Select Show groups if you would like to display the list of your groups.
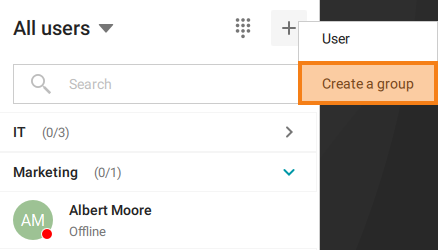
# Adding user groups
At the top of the address book, click on the  button above the search box and select Create a group in the drop-down menu. Now you can start creating a user group. Enter its name and save your changes.
# Editing or deleting groups
To delete or edit a group:
Open your address book and choose to show groups.
Right-click on a group and select Rename group or Delete group in the context menu:

From the same menu, you can also add new users to the group by using the corresponding button.
# Bulk actions
You can also select multiple users for popular bulk actions, such as:
Create a conference
Create a group chat
Create a group
Manage groups
set a notification that several people/a selected group have changed their status to Online.
After using the Notify when all participants are online button, you will receive a notification about each group member changing their status separately. This feature is suitable for you if you need to reach out to people from, for example, a specific department and it doesn’t matter to you who becomes available first.
You can read more about this feature in the section User status change notification.