# Main conference window
The ongoing conference window consists of three main panels:
Go to:
List of participants
Layout settings
Full-screen mode
3. Meeting controls.
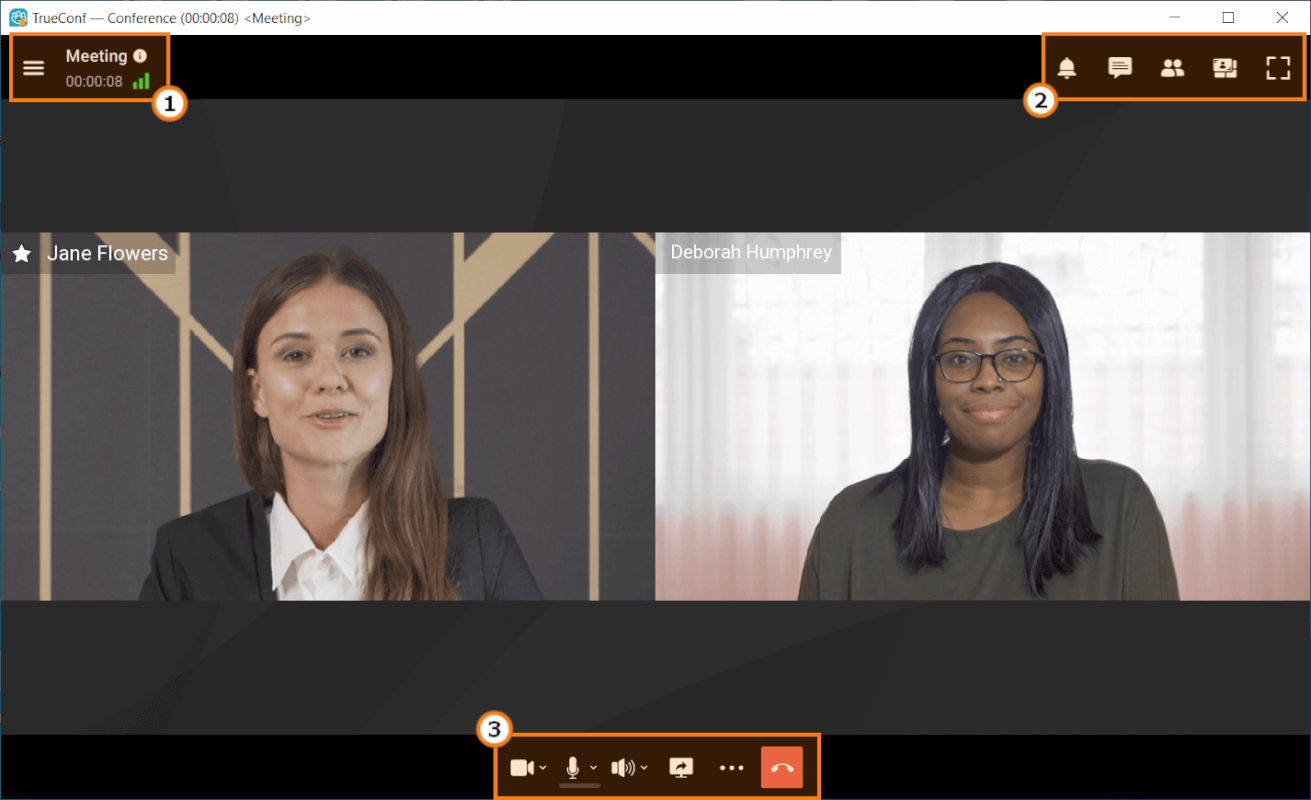
In the central part of the window the conference layout will be displayed.
The Display the conference widget when the application window is minimized box is checked by default in the application settings. In this case the widget will be displayed in the upper right corner during a meeting if you take one of the following steps:
Go to any application section where the conference layout is not displayed (e.g., to the settings section)
Minimize main application window
Go to another program window (if this window covers more than 50% of the conference window).
The widget provides quick control buttons to manage your meeting and a hidden area to preview the selected video stream (speaker's video or your video).
Learn more about all capabilities available during the meetings below.
# Video layout
Video layout is the arrangement of users’ video windows during a group video conference.
Video window is a part of the screen where a participant’s video or shared content is displayed during a video call or conference (this window may also include the participant's name and status icons).
During a conference users can change the video layout on their own in TrueConf client applications. Moderators can also change the layout (for individual participants, SIP/H.323 devices and users connected from a browser) in the real-time meeting management section.
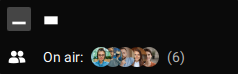
The list of users who have been added to the video conference but do not have their own separate video window will be displayed in the On Air widget.
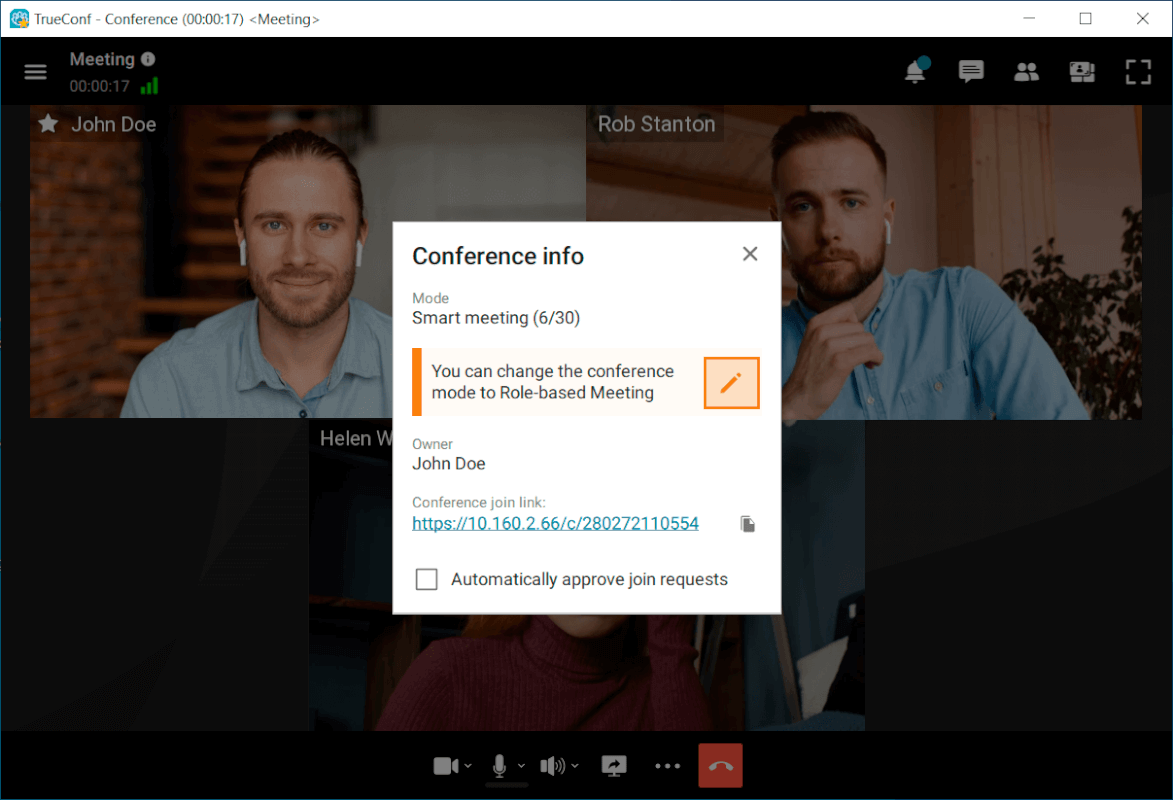
# Conference info
Click on the  button on the information panel to view the conference information.
In the Conference info window, you will find:
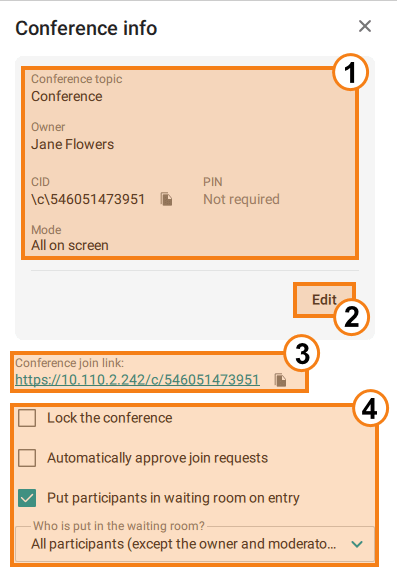
Main information about the conference: Conference topic, Owner, conference ID (CID), conference PIN-code (with the ability to copy quickly) and Mode.
Switch to editing the items described above right during the conference.
The Conference join link line from which you can quickly copy the link to your conference to share it. To copy the conference join link to the clipboard, for instance, to send it via email, use the
 button.
Checkboxes that, when selected, allow you to restrict access to the conference, enable automatic acceptance of conference join requests, or direct participants entering the conference to a waiting room. The last option, when activated, also offers a choice of which specific user category you want to send to the waiting room.
Click on the  button. A context menu will appear with two tabs. On the first tab, About system, you'll find detailed information about your equipment. On the second tab, Connection, you will see data on outgoing and incoming connections.
If necessary, you can save the connection quality report using one of the two buttons:
Save to file to export in .txt format.
Copy to clipboard to send it yourself in any convenient way.
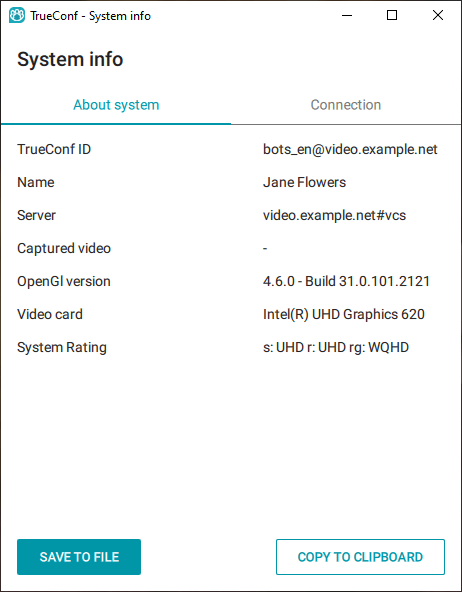
Additionally, information about the software and hardware is available in Settings → More → System info.
# System rating
The system rating indicates the maximum resolution for the following video streams: the video you send to a conference (s:, e.g., FullHD), incoming video (r:) and the maximum resolution of the video layout during a conference (rg: e.g., WQHD or 2560×1440).
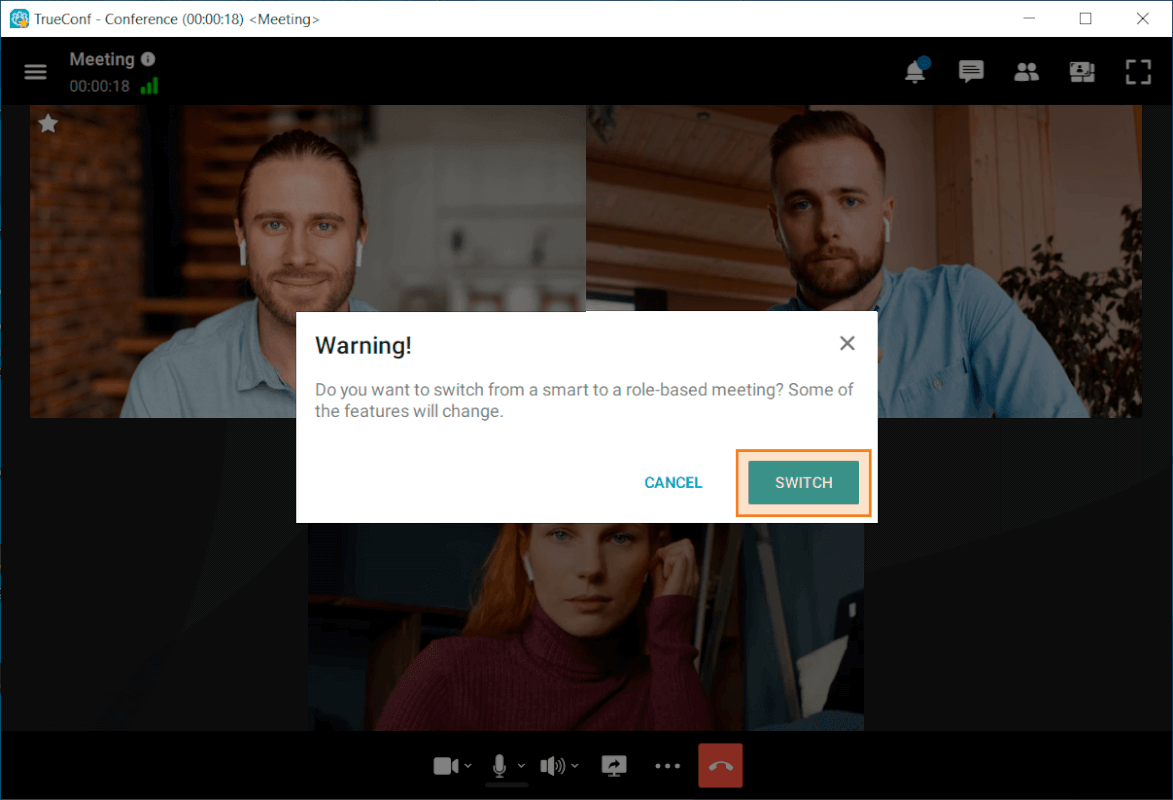
# Changing the conference mode on the fly
A conference in Smart meeting mode can be switched to Moderated role-based mode on the go (no need to interrupt the conference). Similarly, a moderated role-based conference can be switched to a smart meeting on the fly.
A moderated role-based conference with less than 4 spots on the podium cannot be switched to a smart meeting.
To do it, take these steps:
Click on the
button in the upper left corner of the video conference window.Click on
 in the new window.
- Next, click on Switch. Your conference will be switched to a different mode (from a smart meeting to a moderated role-based conference or vice versa).
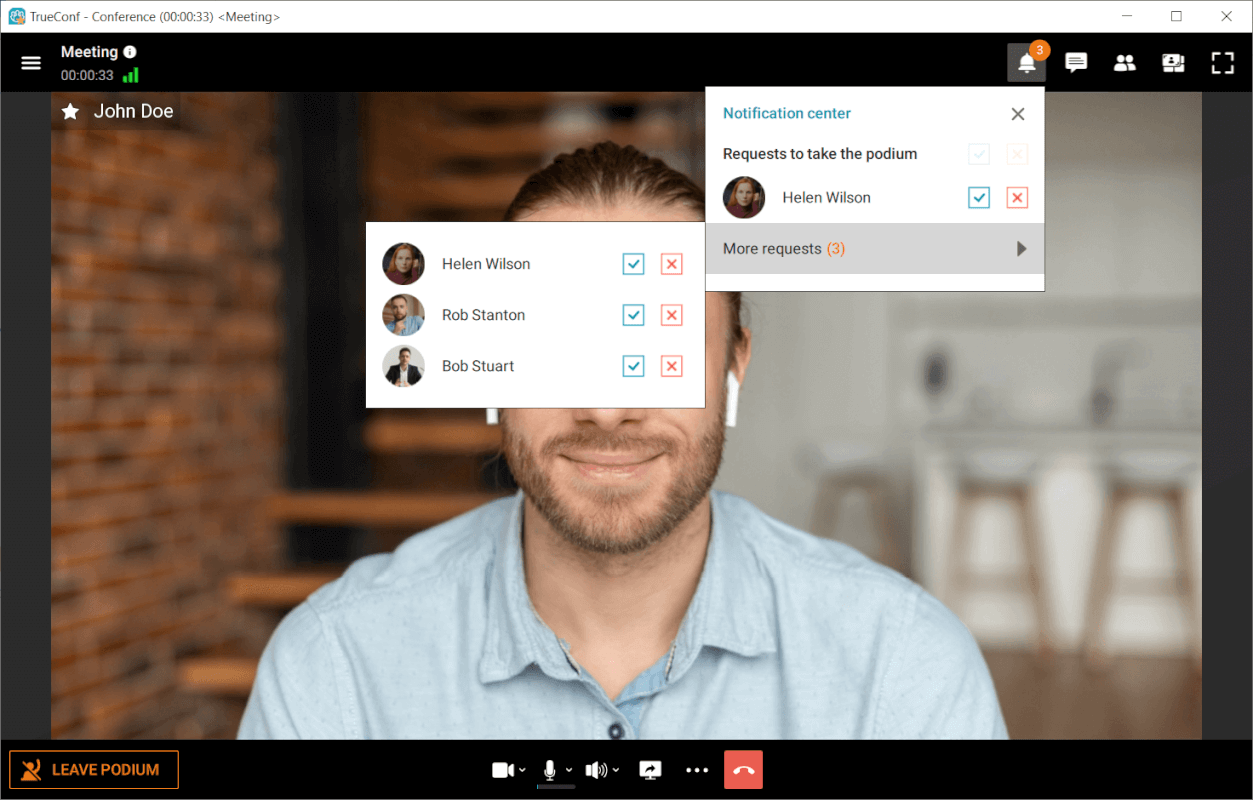
# Notification center
Certain types of requests and notifications will be displayed in the notification centre. The button will have a counter indicating the total number of unread notifications:  . Requests and notifications are sorted by their type and priority.
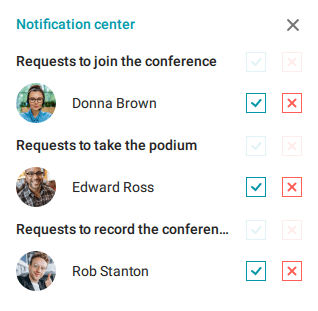
Notifications display in order of importance to the meeting moderator:
- Requests to join the conference
- Requests to take the podium
- Camera control requests
- Remote desktop control requests
- Recording requests
Notifications (unavailable users, rejected podium invitations, etc.)
Notifications display in order of importance to a meeting participant:
- Invitation to the podium
- Camera control requests
- Remote desktop control requests
- Recording request
Notifications (rejecting a call or podium request, etc.)
Within groups, notifications are sorted by the time of receipt.
In case of requests, earlier requests are shown at the top. In case of notifications, later notifications are shown at the top. Up to two notifications/requests are displayed in each group. If there are more alerts, then a drop-down list More requests or More notifications is shown under the first notification. You can click on this list to view the rest of alerts.
There are certain rules for hiding the request in the notification center.
Automatically:
In 100 seconds after the alert has been received
The request will be hidden if another moderator replies to it or if it is resolved automatically as a result of a counter request.
Manually:
If you have clicked the Accept or Decline buttons
If you have clicked the Accept all or Reject all buttons for a group of requests.
You can hide notifications only manually.
# Managing devices during a conference
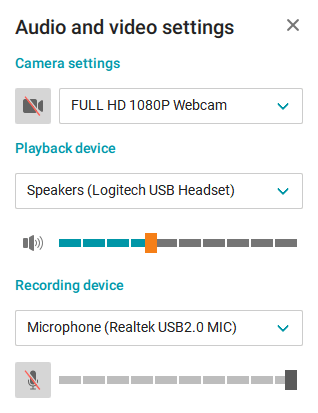
# Audio and video settings
During a conference, you can not only turn on/off the participant's camera or microphone but also select the AV peripherals from the list of user's available devices.
If your microphone is muted, you can still send an audio remark at any time (except the cases when you are in a video call or a smart meeting) with the Push to talk button available in the conference control panel (and with shortcuts CTRL + T or Space) as it is shown in the example for a moderated role-based conference.
To select a different camera, speakers or microphone during the meeting, click the  button displayed next to each device icon and select the device. You can also click on the button and go to Audio and video settings.
You can select a different camera by clicking on the  button available in the self-view window. To activate background blurring click
  .
.
If other participants cannot see or hear you during a conference, check whether your camera and microphone are on. In case if the microphone is off, you will see a corresponding message at the bottom of your conference window.

To turn on your camera or microphone, click on the corresponding buttons  and
and  at the bottom of the conference window.
You can also change some of the camera parameters by right-clicking on your self-view or video window during a conference. It is possible to configure background blurring, virtual backgrounds, face tracking, and the camera which is being used at the moment.
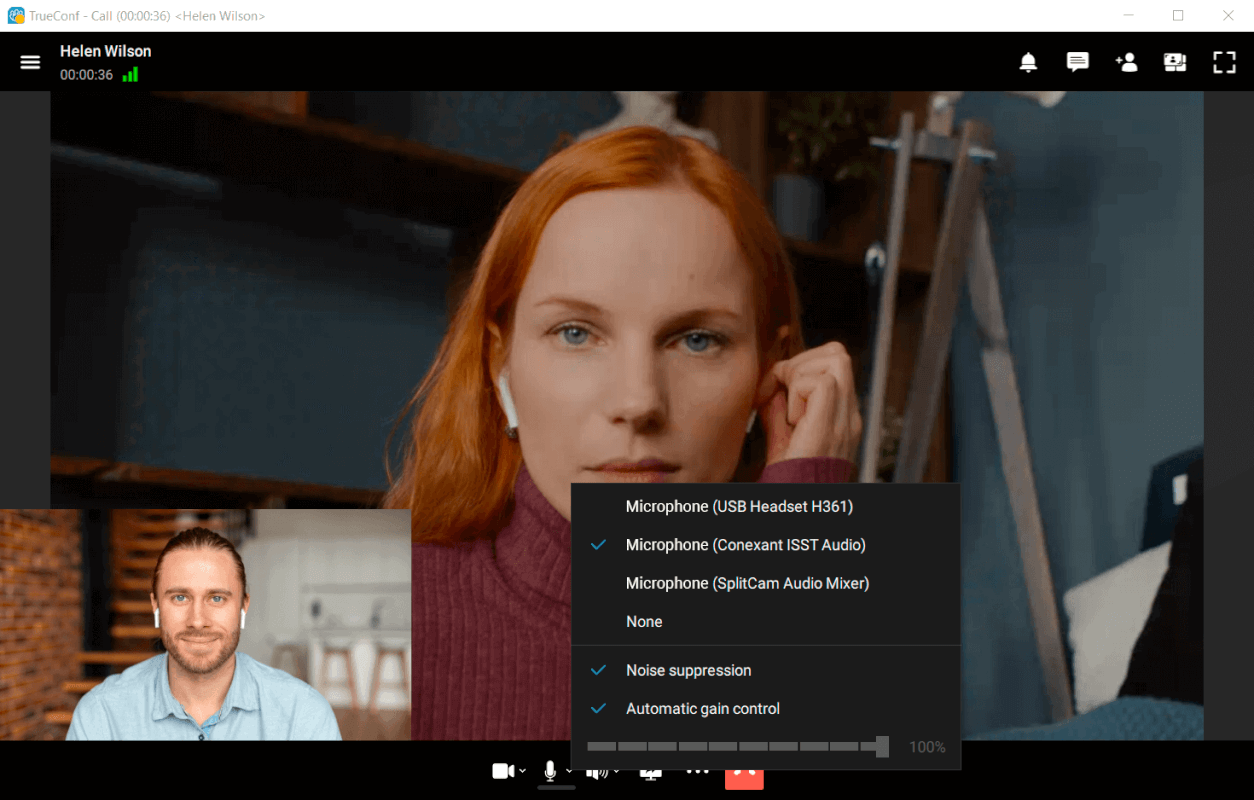
# Noise cancellation
TrueConf client application uses AI-based noise-cancellation algorithms allowing meeting participants to stay focused on their discussion, rather than the surrounding noises. All external sounds of any volume (even the sounds of construction tools or air fan noises). To activate this feature click on the ![]() button which is next to the microphone icon in the meeting control panel. In the new menu, mark the Noise supression option. You can also enable this feature in the Settings → Audio and Video → Audio menu.
button which is next to the microphone icon in the meeting control panel. In the new menu, mark the Noise supression option. You can also enable this feature in the Settings → Audio and Video → Audio menu.
# Reactions and polling
During conferences you can ask participants to take and participate in polls using reactions:

Reactions and polling do not directly affect conferences. Instead, they serve only as an additional means of sharing information between participants. This mechanism can be used to express your opinion during a video conference without making audio reply.
You can set the reactions in the conference control panel. Click on the button , go to Reactions—and select the reaction you want. If required, the reaction can be changed (simply by choosing another one) or reset (using the button below).
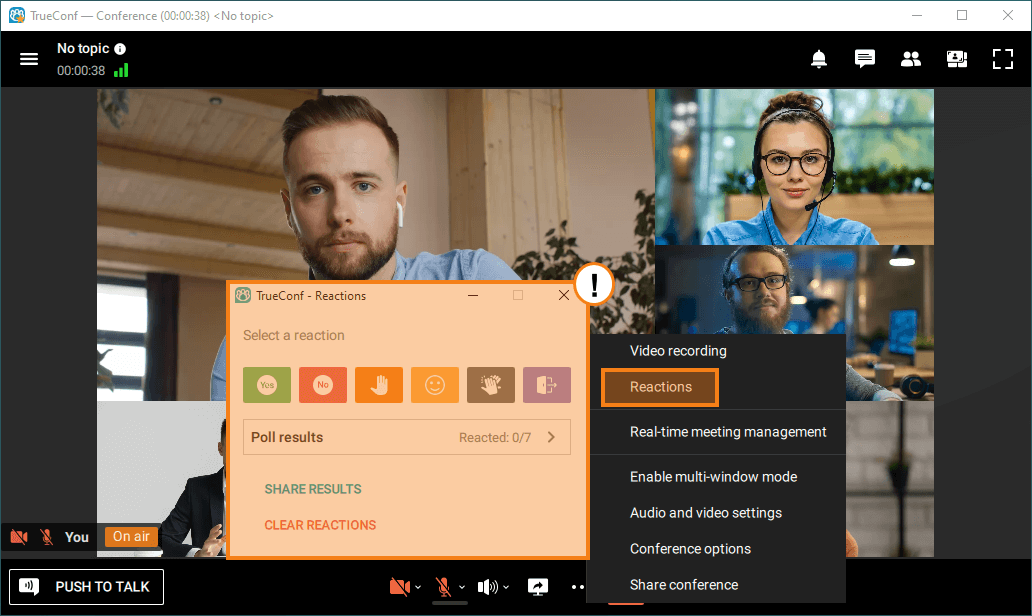
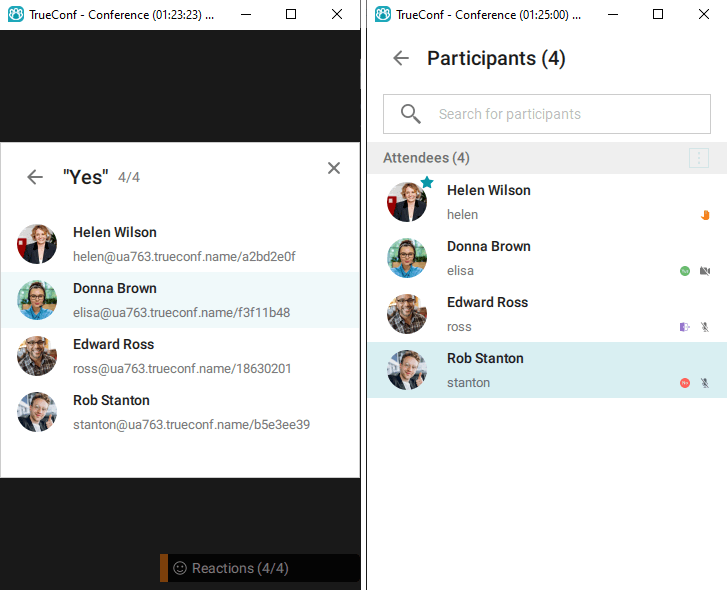
Next to the reactions, you can see the Reacted counter that displays the number of participants who have already reacted or taken poll.
Please note that “Yes” and “No” statistics is calculated taking into account all conference participants (not only those who voted). For example, if one attendee votes “Yes” and other attendees do not vote, then “Yes” will still have only 20% in a conference for 5 users.
You can view reaction of each user separately. Their reactions are displayed both in the list of participants and right in the reaction menu.
The conference moderator can clear all the reactions posted by other participants. To do it, click Clear reactions displayed at the bottom of the reaction menu.
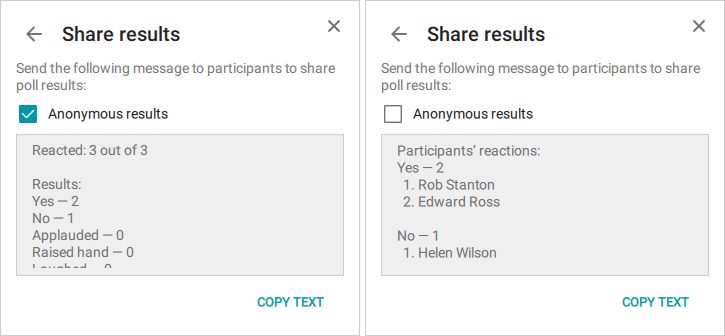
In this menu, the moderator can also save the reaction stats. To this end, click Share results → Copy text.
Uncheck the Anonymous results box to upload detailed stats showing user votes.