# Audio and video settings
# Video
In the application window, go to the Settings menu by clicking on the  button. Next, select the camera in the Video subsection of Audio and Video.
If the Face tracking feature is enabled, the built-in AI module will crop the video so that your face would always remain in the center while the background on both sides would be mostly cut out. The resulting frame will be scaled to fit the available video area. If there are two or more persons in the frame, the video will be adjusted to fit all of them. Your face will be tracked even when you are moving.
Face tracking is available for the cameras with the resolution 1280х720 (720p) or above.
# Background blurring
TrueConf provides background blurring feature. It is available for any computer that meets the general system requirements and can be used for both one-on-one video calls and group video conferences.
The blurred background feature can be useful in a slew of situations, e.g., if you need to focus on the task at hand during meetings. Even if you don't work remotely, office distractions can be a problem.
Besides, this feature will be useful in case of remote learning, as the children's room may look unsuitable due to the clutter or bright posters. By blurring the background, they will feel more comfortable at the meetings.
The background blurring feature may be unavailable if your system does not meet the required performance parameters or is overloaded with CPU consuming processes.
To blur the background, take the following steps:
Go to the Settings → Audio and Video → Video section.
Click on the
 button. You will immediately see the result in the preview window.
To disable background blurring, click on the  button.
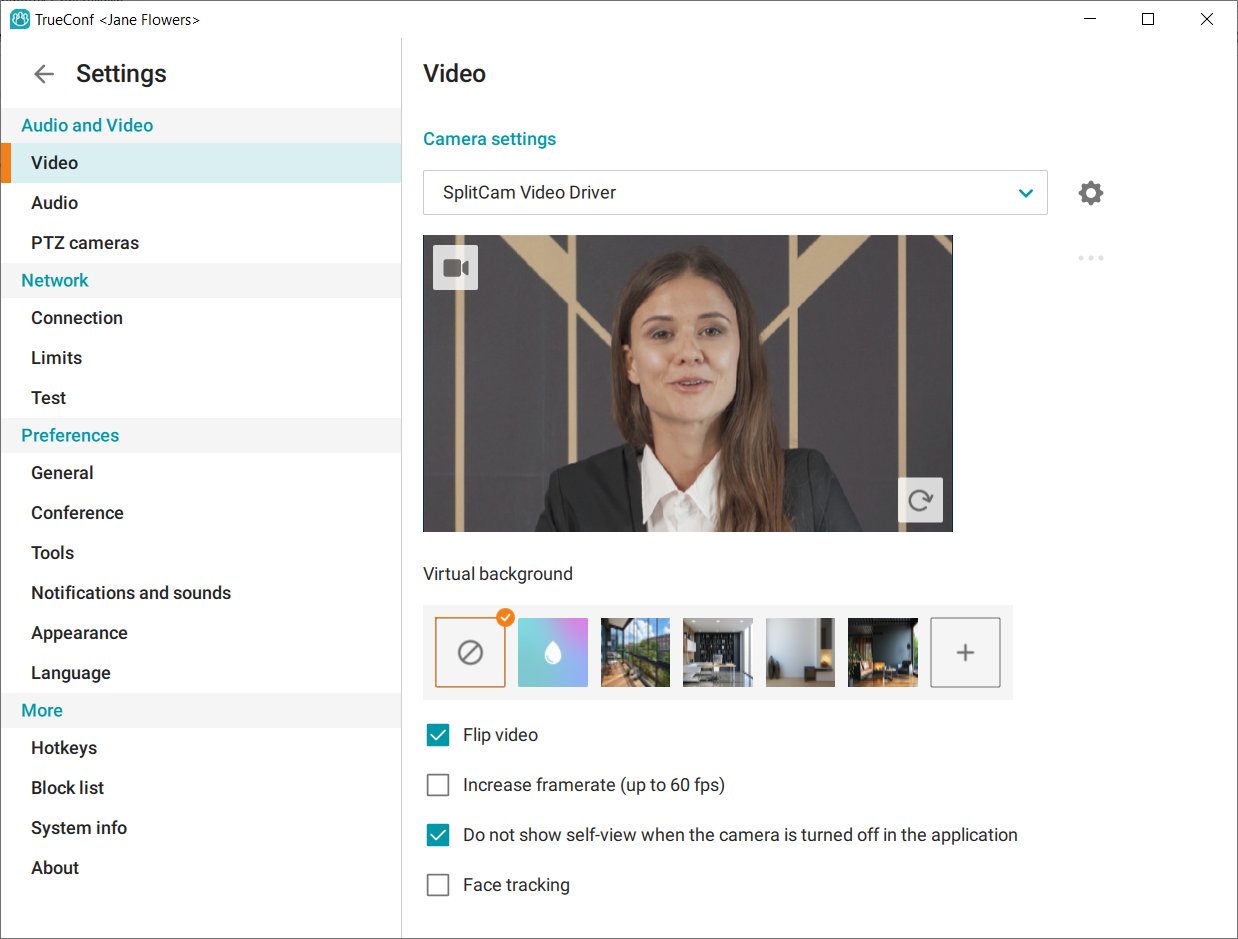
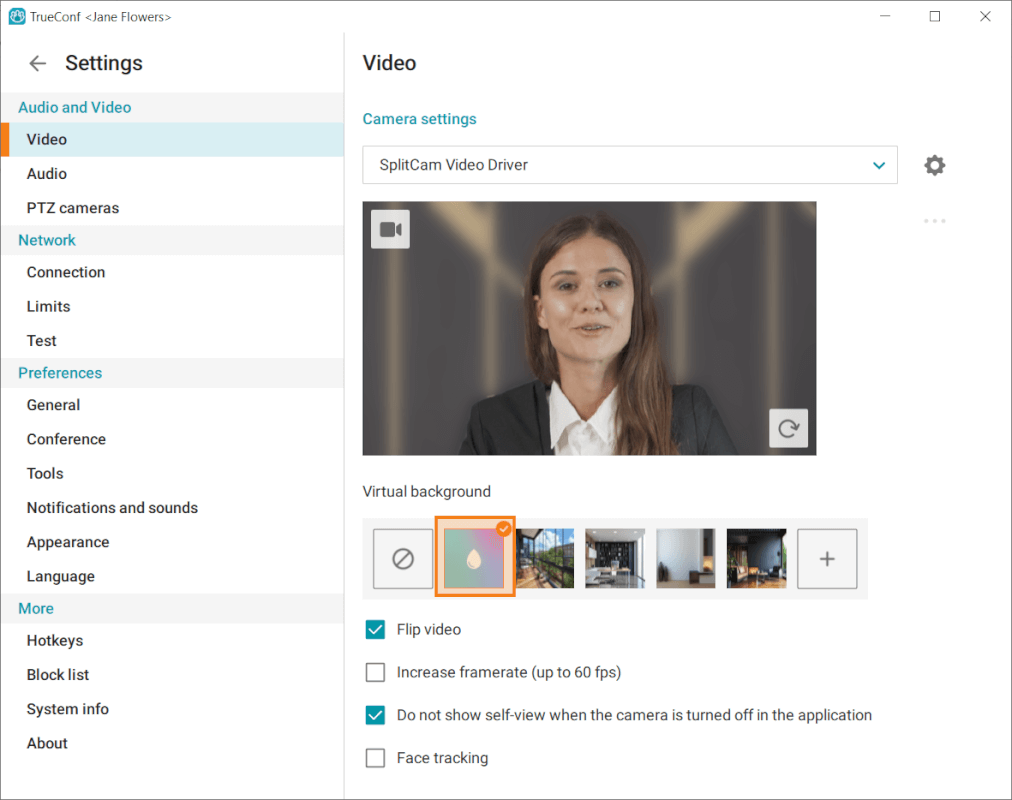
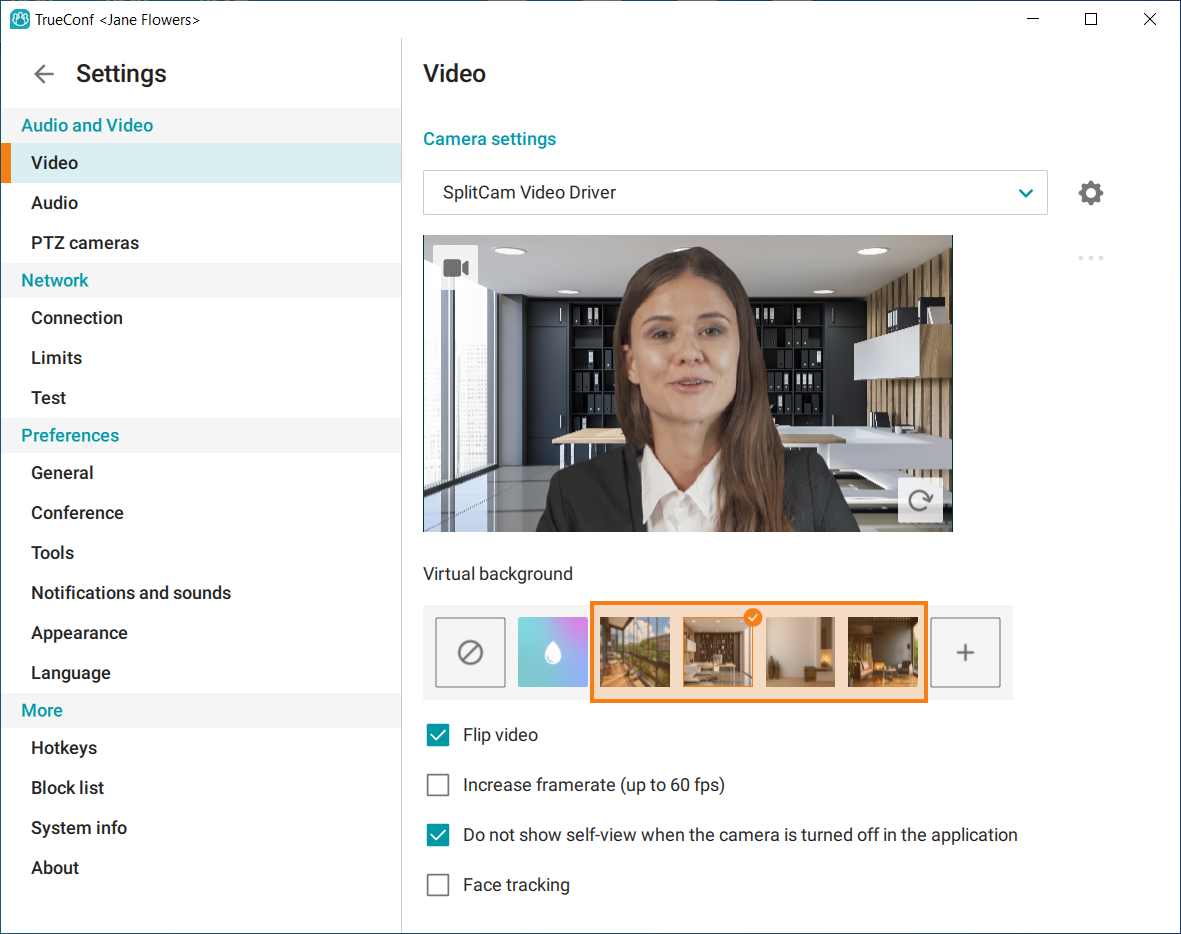
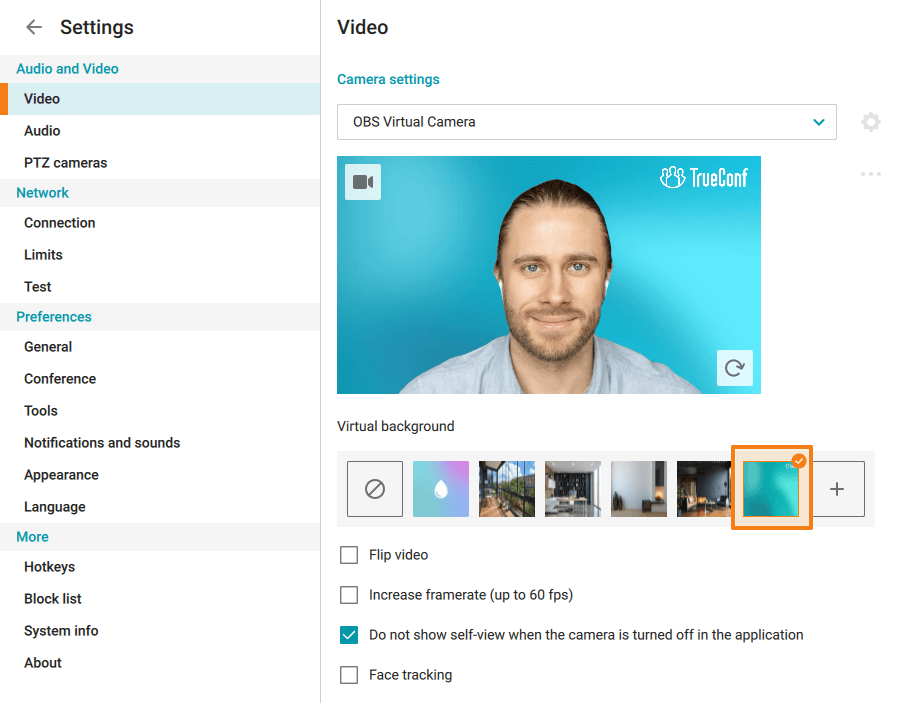
# Virtual background
If you want to hide your background, you can replace it with a virtual one. To do it, go to the Settings → Audio and Video → Video section and select any of the default images in the Virtual background sub-section.
In addition to using a virtual background, users can also blur their real background. Check the corresponding sub-section for more details.
If none of the default images suits you, it is possible to upload a custom image. In order to do it:
Click on the
 button in the Virtual background section.
In your OS file manager, select the desired image (supported formats are .jpg, .png, .svg, .jpeg, .png, .gif, .jpe, .jif, .jfif, .jfi, .bmp, .png, .gif, .webp).
When using the .gif format as a background, only the first frame will be used, not the entire animation.
The image that has been added will be displayed in the list and you will be able to set it as a virtual background.
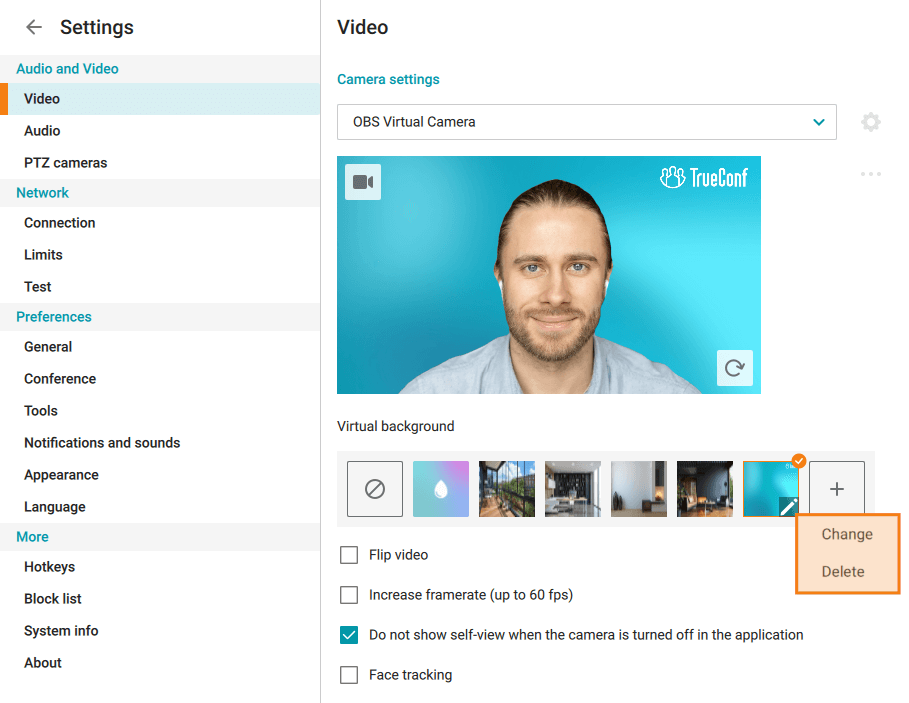
When a virtual background has been added, you can change or delete it. In order to do it:
Hover the mouse cursor over the image added to the list of virtual backgrounds.
Click on the
 button that will pop up.
A context menu will be opened; here you will be able to change the image Change or delete it Delete.
To disable the virtual background, click on the button.
# Audio
To adjust settings for audio devices, go to the Audio subsection of Audio and Video. Here, you will be able to select playback and recording devices and set their volume level. Please note that you will be able to select different devices for notification sounds and conference audio.
Additional settings are available in the Recording device section (below the menu for selecting the microphone):
Echo cancellation
Automatic gain control.
Noise suppression
Enable diagnostics audio dump which may be helpful when sending log files to our technical support.
Audio dump files like other application log files are not deleted automatically, So, if the box Enable diagnostics audio dump is checked, the folder with audio dumps will grow in size in the long term.
These options are automatically enabled, and they are helpful in most cases. However, if you use a recording device with integrated echo cancellation/AGC mechanisms, we recommend disabling these options in the application to avoid conflicts between algorithms.
The Noise suppression checkbox activates the work of an AI-based mechanism that will suppress all external sounds except your voice.
The Noise suppression feature has several operating modes, with the selection between them being made automatically depending on the performance of the user's computer.
For the echo cancellation algorithm to work properly, you can run an audio test and identify a possible delay. To do this, click Estimate at the bottom of the window.

During the testing, you will hear several audio signals from the selected playback device. When the test is successfully completed, the time of delay will be displayed.
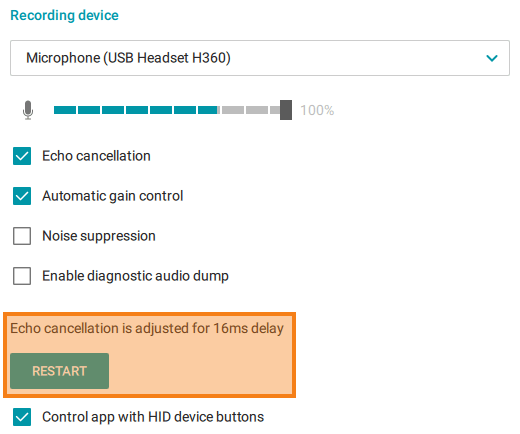
You can run the audio test again by clicking the Restart button, which will replace the Estimate button after the first successful testing.
The Control app with HID device buttons checkbox allows users to control the application with the hardware buttons on a speakerphone or headset.
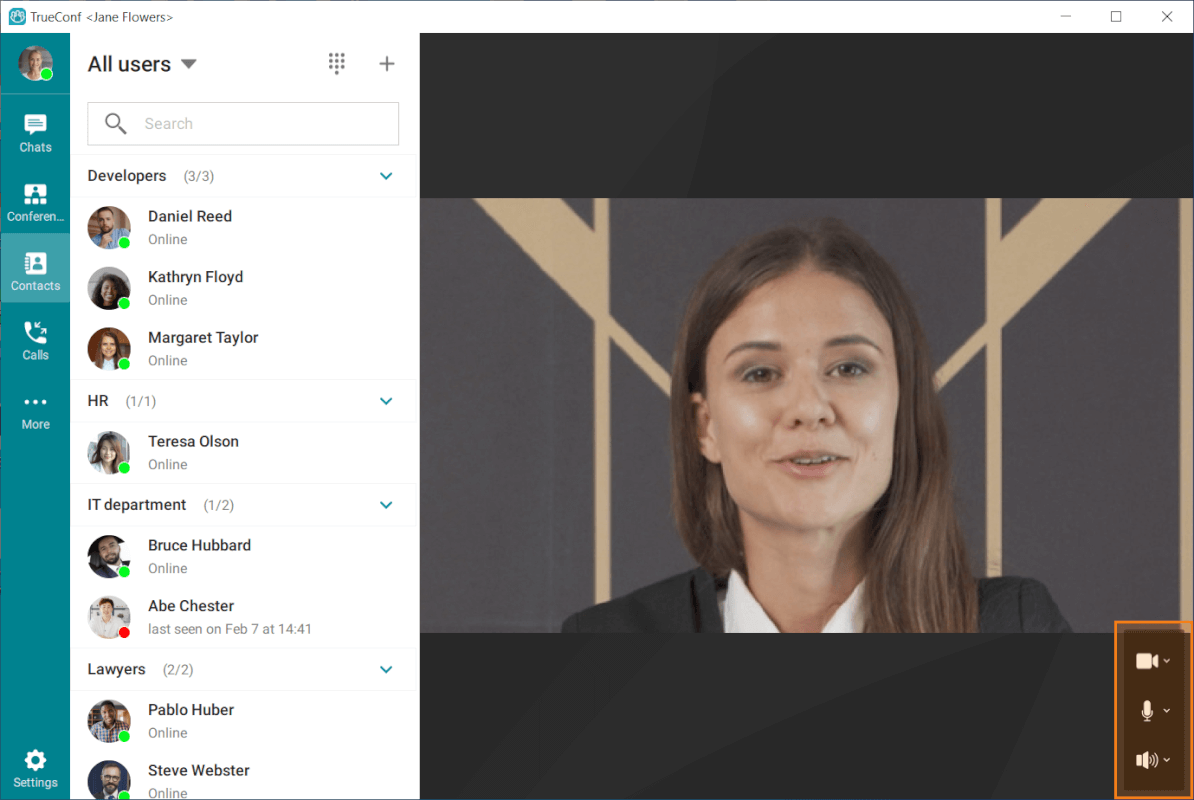
# Quick audio and video settings
You can also configure video devices in the Contacts section (where the video from your camera is displayed). The settings menu can be found in the lower right corner of your video area.