# Setting up
# How to connect
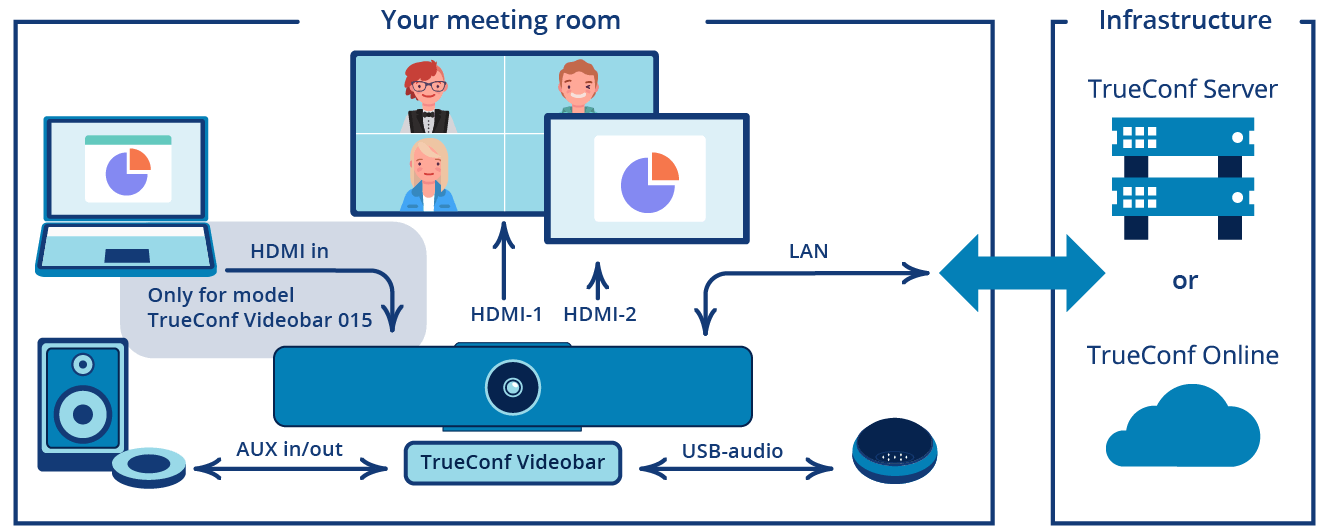
Connect the power cable, network interface, monitor and audio output devices (headphones, speakers or output audio via HDMI to a monitor with built-in speakers) to your video conferencing endpoint.
If you need to output audio via HDMI, please use HDMI out 2, as HDMI out 1 doesn’t support audio stream output.
You can also connect the following devices:
Additional monitor
External webcam and microphone
Content display device (for TrueConf Videobar 015).
# Remote control buttons
You can manage your endpoint using the remote control powered by two AAA batteries (included in the package). It uses a 2.4 GHz band that helps enhance the control range and usability as compared to IR remotes.
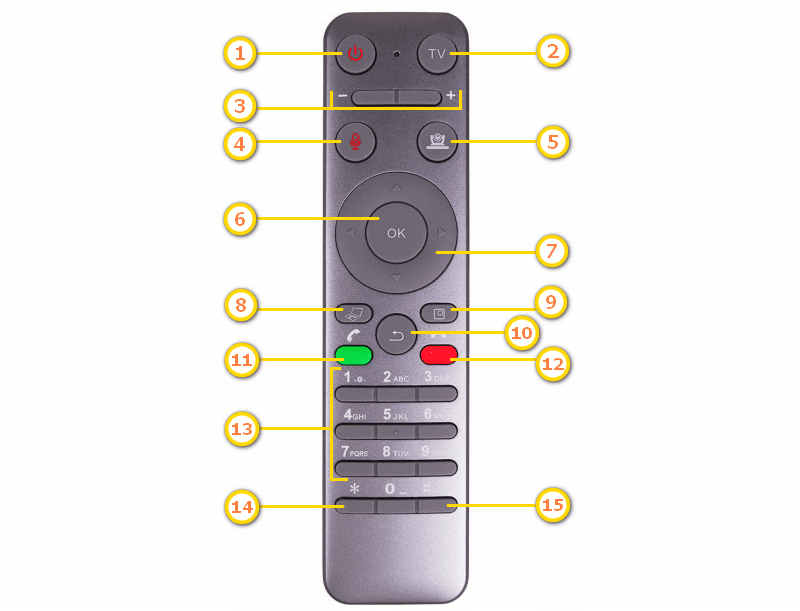
Turn on the endpoint.
Programmable button.
Adjust the speaker volume.
Mute the microphone
Disable the camera
Go to the selected menu item or activate the interface button.
Arrow buttons — navigate between interface elements.
Switch between camera images being transmitted to the conference (if external cameras are connected via USB) and content captured via HDMI (for TrueConf Videobar 015).
Changing video layouts (coming soon with a firmware update).
Return to the previous menu section.
Take an incoming call or call a user in the address book/call history.
Depending on the usage scenario:
Decline an incoming call
End a video call
Leave a group conference
Delete a character before the cursor in the input line, e.g., when connecting your endpoint to a video conferencing server)
0-9 number keys (no T9 support).
Depending on the usage scenario:
Enter a period in the input line, e.g., when connecting to a video conferencing server
Take and leave the podium in a role-based conference.
Make an audio remark in a role-based conference:
By giving this button a single press, you can open the audio remark menu, while you need to press the OK button to start broadcast and OK or return
 buttons to stop broadcast
Push and hold this button to open the audio remark menu and talk until the button is released.
# Managing multiple endpoints using a single remote control
You can manage several TrueConf Videobar endpoints simultaneously using a single remote control. To do it, you should bind your remote control with each device as follows:
Press the OK and asterisk buttons on your remote control simultaneously and hold them — the LED will start blinking after 3 seconds.
Release the buttons — the LED will keep blinking.
Turn on the endpoint.
If the binding is successful, the LED will be coming on for 2 seconds and then turn off. Otherwise, if there is a pairing error, the LED will be quickly blinking for 20 seconds and then will be slowly blinking for 3 seconds. After that, the remote control will go into sleep mode.
To unbind the remote control from TrueConf Videobar:
Turn on the endpoint.
Press the OK and hash buttons simultaneously and hold them down on your remote control for 3 seconds — the LED will start blinking.
Release the remote control buttons — the LED will turn off, while the device will be unbound. Otherwise, if there is an error, the LED will be blinking for 20 seconds, while the remote control will go into sleep mode.
# Starting the endpoint and adjusting network settings
To turn on the device, hold down the power button on the remote control for 2 seconds. The endpoint automatically turns on when power is on.
Once the endpoint has been turned on, the home screen will be displayed on the main display.
The notification bar is located at the top of the screen, where the device status icons are displayed:
Bluetooth connection
“Do not disturb” mode (active/inactive)
Wi-Fi or Ethernet network connection
Current time.
First of all, you should connect to a network. By default, the device is set to operate in an Ethernet network and automatically receive connection parameters via HDCP. Just plug an Ethernet cable into your endpoint and wait for the authorization window to appear.
To make sure you enjoy the best audio and video quality, your communication channel should meet our bandwidth requirements. We recommend using a wired connection if possible.
If necessary, you can manually set up an Ethernet or Wi-Fi connection by going to the system settings in the lower right corner on the authorization page.
# Connecting to your video conferencing server
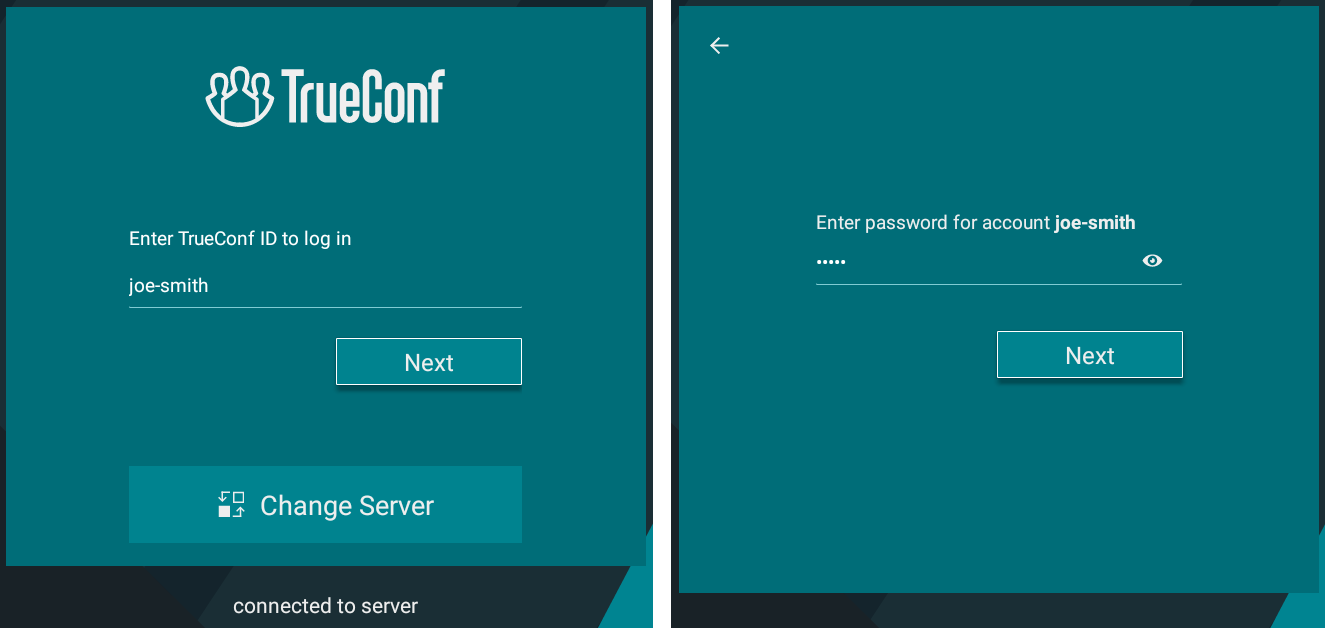
At the first launch of TrueConf Videobar you will be prompted to select the connection server and one of the available sign-in options:
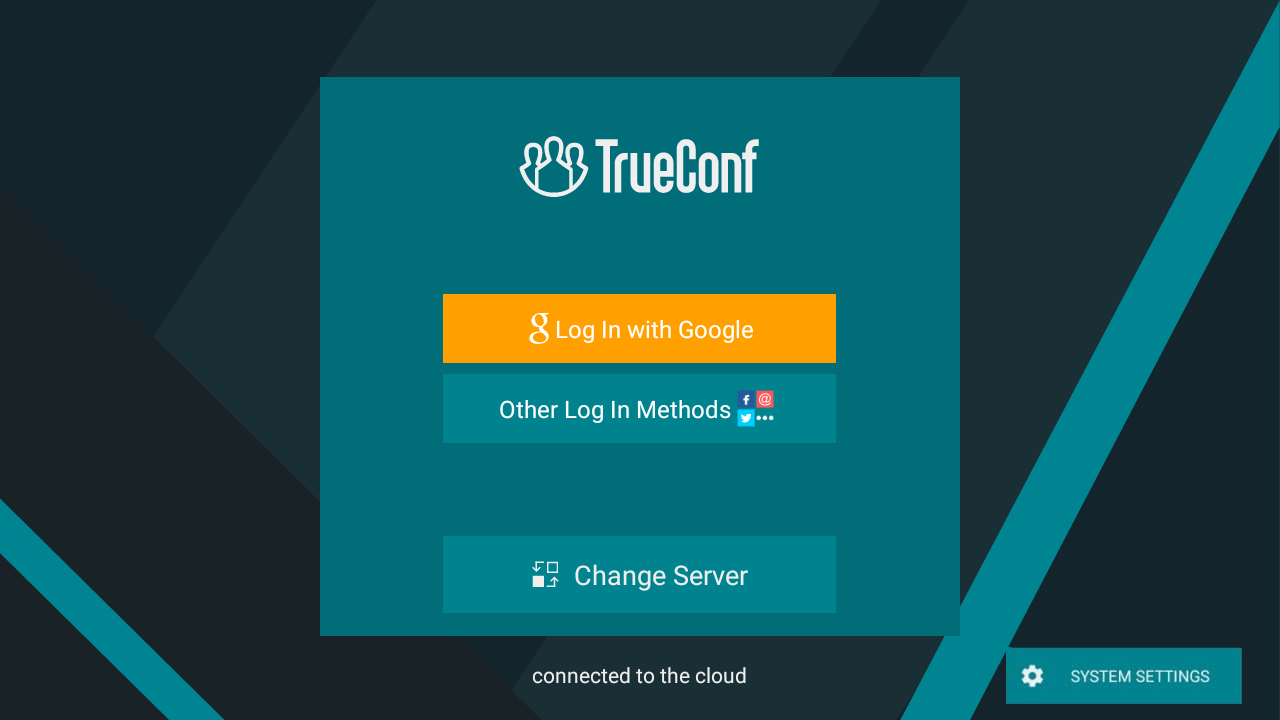
The endpoint can be connected either to TrueConf Server corporate video conferencing system or TrueConf Online cloud-based service (set by default).
To sign in to a cloud-based service, select one of the available options: using TrueConf account (can be created on the TrueConf official website), Google account, or one of the social network accounts.
To connect to your TrueConf Server instance, press the Change Server button.
In the pop-up window, choose TrueConf Server and enter your server’s IP address or domain name, e.g., server.company.com. Press Connect:
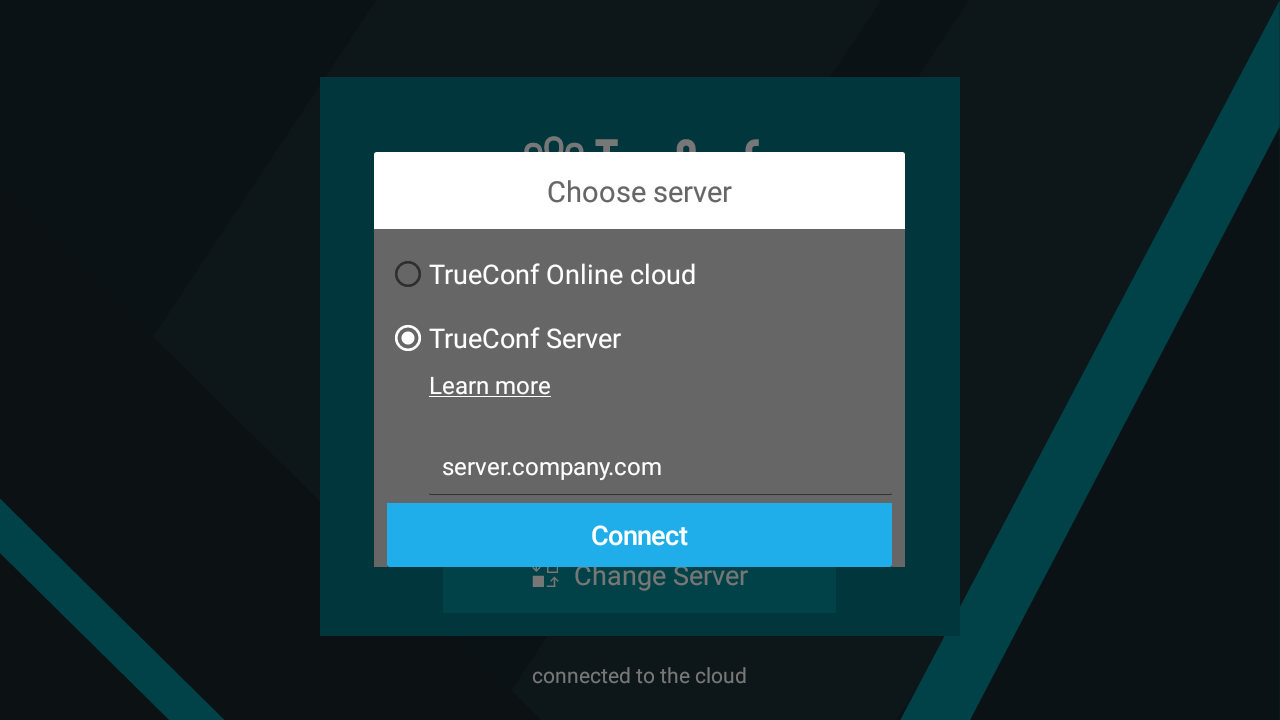
Enter your account credentials: login (TrueConf ID) and password:
When you first start the application, you need to set up the audio and video devices connected to your device:
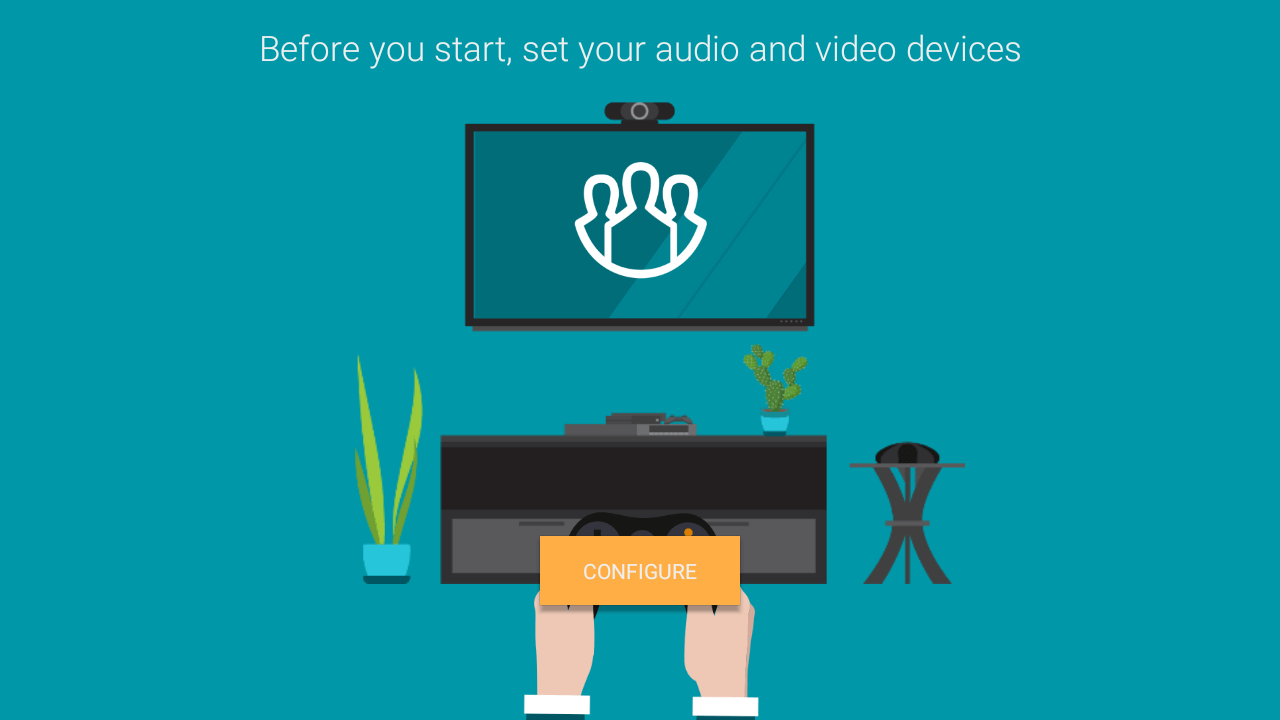
Besides the built-in microphone array, you can use the following audio capture devices:
External webcam’s microphone
USB speakerphone or microphone
If necessary, you can connect and switch to other AV peripherals during a meeting.
Allow app permissions to record audio, take photos and videos at the corresponding requests.
After that the start screen will open.