# Connecting BKR conference system to Weathervane
# BKR discussion system description
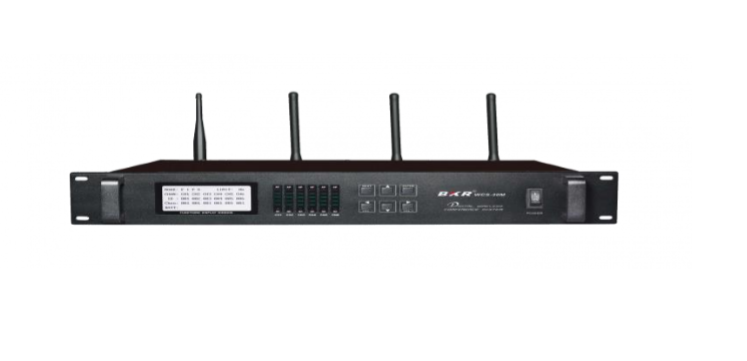
BKR discussion system is a set of audio equipment that consists of the control unit and microphone consoles.
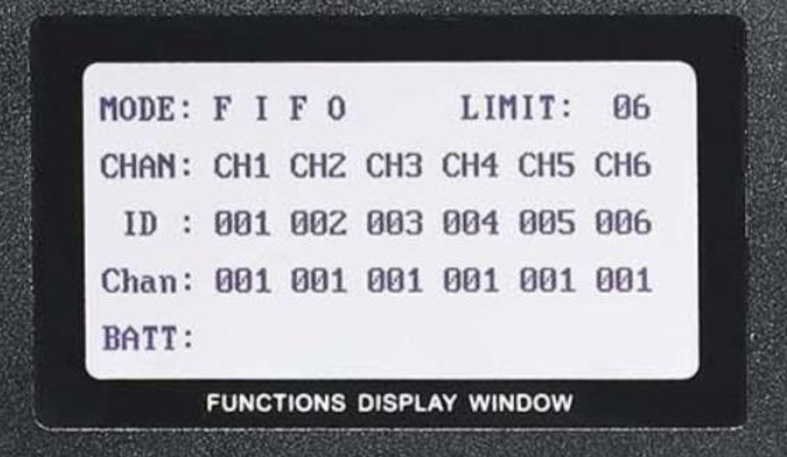
Conference system control unit is designed for discussion system setup and conference control. See WCS020 control unit on the figure below:
# Connection
# How to connect BKR control unit
This guide describes how to connect BKR control unit to the computer with TrueConf Weathervane software installed.
First we should organize a data transmission channel from BKR control unit to the computer that transmits information about active microphones. Data transmission channel allows you to activate necessary cameras and set their positions in order to ensure seamless videoconferencing.
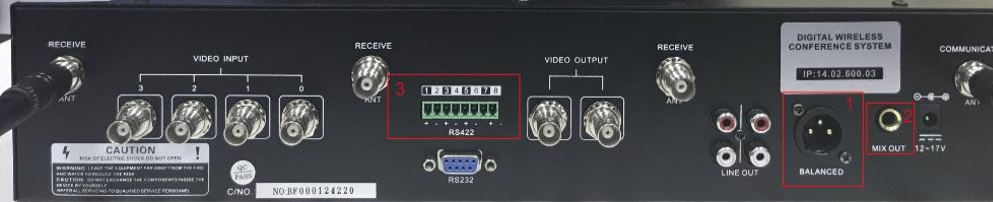
BKR control unit transmits necessary information through Rs485 interface. No.3 port is used for data transmission (see the figure below). You are free to use plug pins No. 1 or 2.
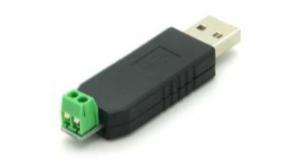
Rs-485 - USB adapter (see the figure below) can be enter to input information to the computer:
# BKR discussion system setup
To ensure microphone interaction with the control unit, set the same Link-IP and Link-ID values for the microphone and control unit. This will allow you to use several control units simultaneously.
Unique ID Unit-ID is set for each microphone corresponding to the preset number. BKR control unit will pass this ID to the computer after the microphone has been activated.
Control unit microphone has two modes:
StandBy (the microphone is not connected to the control unit);
Connected (the microphone is connected and transmits sound to the control unit).
Please note that you can set up microphones in StandBy only.
Upon pressing On button the microphone connects to the central control unit. If connection is successful the microphone goes into Connected mode.
To set up the microphone, first activate one microphone and then turn on BKR control unit. In this case the microphone will go to StandBy mode and will be ready for setup.
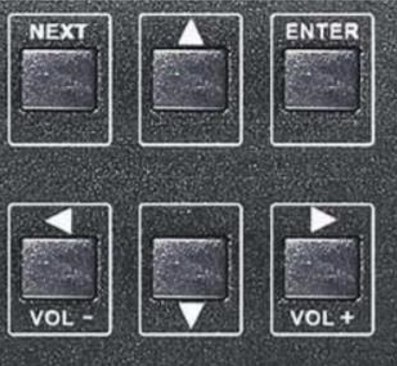
- The microphone can be set up from the BKR control unit menu. Press ENTER twice, and information will be transmitted to the microphone in StandBy mode.
# Order of Configuration
# How to set microphone Link-IP and Link-ID
For convenience we offer to set all values to 1 for the only control unit.
Turn the microphone on (check the battery first).
Turn on central control unit.
On the central control unit:
Press NEXT twice to open SYSTEM menu
Press ENTER
Press UP and DOWN to set Link-IP
Press RIGHT
Press UP and DOWN to set Link-ID
Press ENTER twice
Make sure that set values are displayed in the upper part of the microphone screen (parameters values C-IP and C-ID)
Turn off the microphone.
# How to set up microphone unique number (UNIT-ID)
Unique number shall be set for each microphone (starting with 1 for the first microphone, 2 for the second one, etc.).
Turn on the microphone.
Turn on central control unit.
On the central control unit:
Press NEXT three times to choose UNIT SET menu;
Press ENTER;
Press UP and DOWN to choose necessary UNIT-ID value;
Press ENTER twice;
Make sure that set values show up in the upper part of the microphone screen (U-ID parameter value)
Turn off the microphone.
Then turn the microphone on and make sure it is connected to the BKR system.
When the microphone is connected, DeleGate message will be displayed on the screen, while red light will be activated on the corresponding channel of the BKR control unit.
# How to set up interface for output data
Pelco-D protocol should be set up for successful system operation.
Turn on the control unit.
Press NEXT four times to choose PTZ SET menu.
Press ENTER.
Press UP and DOWN and choose Pelco-D item.
Press ENTER twice.
# Checking the settings
# Microphone operation check
Turn on the control unit.
Turn on the microphone. The number of connected microphone will appear on the screen of the control unit, while the red light will be activated.
# Checking external interface operation
In order to check RS-485 operation, BKR output unit should be connected to PC using USB<->COM adapter.
Any software for data reading from COM port shall be installed on PC. We recommend Terminal 1.9b.
Checking external interface operation:
Connect USB<->COM adapter to PC USB port.
Proceed to Device Manager → Ports(COM & LPT) define the number of COM port that corresponds to the adapter.
Launch BKR unit.
Launch the Terminal software.
Choose the necessary Com port in the Terminal program:
- make sure that port parameters are correct (BaudRate: 9600, Data bits: 8, Parity: None, Stop bits: 1);
set HEX data display mode;
press Connect.
Turn on the BKR microphones. Data string received from the BKR control unit shall appear in the Terminal software window:
FF XX 00 07 00 YY ZZ (7-8 bytes, first byte – FF).
XX - camera number (default 00);
YY - preset number (parameter Unit-ID set for the camera);
ZZ - check sum.
Example of data line: FF 00 00 07 00 03 0A (where Unit-ID = 3).
If accepted data differ from the required format, make sure that data format Pelco-D is set in the BKR control unit. If data format is set correctly invalid data may be caused by improper connected data wires that connect BKR control unit and USB<->COM adapter. In this case, switch the cables.