# Initial setup
# Control panel access settings
By default TrueConf Server can be administered from any computer in the same local network where it was installed. In other words, by default access is limited to the following ranges of IP addresses: 10.*, 192.168.*, 172.16-172.31, 127.*.
To get remote access to the TrueConf Server control panel, you need to sign in with an admin account. The admin is a member of one of the following groups:
TrueConf Server Admin for Windows (tcadmins for Linux) to manage TrueConf Server
TrueConf Server Security Admin for Windows (tcsecadmins for Linux) to view logs and conference recordings.
If you install TrueConf Server on Windows, your current account will be automatically added to the first group. For Linux, the users specified manually during the installation process are added to the tcadmins group. To make the control panel accessible to another user, the administrator should add this user’s account to one of the groups listed above.
If you use Windows, members of the Administrators group will also have admin access to the TrueConf Server control panel. For Linux, access to the control panel is given to the users specified when installing the server.
You can learn how to create a new user account on different operating systems and add it to the desired group on the example of TrueConf Server Security Admin in our documentation.
TrueConf Server does not impose any restrictions on the number of administrators of each type.
If an administrator wants to manage TrueConf Server from a remote computer, they need to make sure that the firewall allows incoming connections over the control panel access port (80 by default) and that this option has been enabled in the Security section of the TrueConf Server control panel.
Learn how to administer TrueConf Server outside your local network in our article.
# Server status
Server status is shown in the Server status field in green (if the server is working) or in red (if it has stopped) in top right corner of the control panel:

What to do if server is not running?
Stopped status is displayed in the Server status string.
There are three possible reasons for this:
Invalid license: contact your system supplier to get a license.
Some server files are missing or have been damaged: reinstall TrueConf Server (see Installation)
The hardware key is invalid: check the manual to fix the hardware key issues.
# Server log
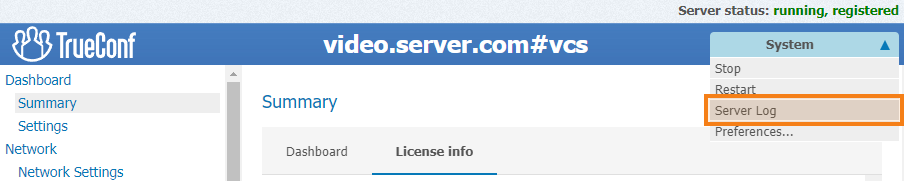
If you encounter any issues with TrueConf Server, TrueConf support team will be able to help you troubleshoot them more efficiently if you provide your server log files. To access the main log, go to System → Server log located in the top right corner of the control panel.
Check Enable detailed logging in Dashboard → Settings section of the control panel to collect more detailed information in your server logs. Our technical support managers may ask you to do it to ease the troubleshooting process.
A range of additional log files is saved in the TrueConf Server working directory. Learn more about additional log files in our article.
# Configuring preferences
Some settings can be set up personally for each TrueConf Server administrator. e.g., control panel interface language, time zone, and reports export parameters.
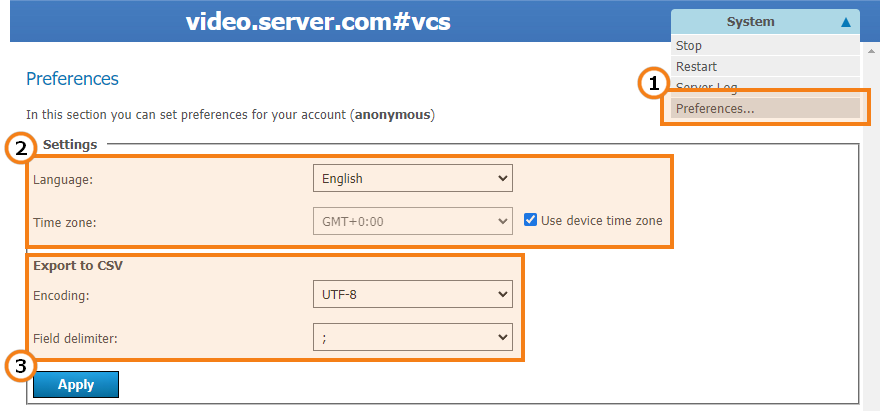
Proceed to System → Preferences... in the upper right corner of the control panel.
Select your language and time zone. Please note that the time zone will be applied to your meetings in all server logs and during the scheduling process. You can use the time zone of the computer where your TrueConf Server is installed by checking the corresponding box.
You can set report export parameters (encoding and field delimiter to convert the table string to text format) in the Export to CSV section.
After making any changes make sure to click Apply button.
# Adding users
# Where can I find client applications
Send out the link to the guest page to your users to allow them to connect to your video conferencing system. They will be able to download client applications for any supported platform on the guest page.
The guest page is available at http[s]://<server>[:<port>] where:
<server>- address of the PC with TrueConf Server installed<port>- port used to access the control panel (if you are using default80port, you don't need to specify it)
For example:
https://videoserver.company.comhttp://100.120.12.12:7777
You can configure the guest page URL in the Web → Settings section of the control panel.
# How to connect client application to TrueConf Server
You need to specify the server address in the network settings of your client application so that your client application can connect to your TrueConf Server instance and your users can authorize. You can either do it manually or let your client application find the server automatically via DNS.
Once connected to the server user will be prompted to authenticate on this TrueConf Server instance with username and password.
# Client application manual setting
Users can configure connection to TrueConf Server manually. In order to do it, you need to specify the TrueConf Server address and connection port manually in the application network settings menu (or upon the first application launch). You can find detailed instructions on how to connect an application to the server on the guest page.
# Client application automatic settings
Desktop client applications can automatically search for local TrueConf Server instance. To make this possible administrator needs to specify the address of the server in primary DNS suffix by creating a new SRV record for vcs2 service.
The following example shows how to do this using DNS utility in Microsoft Windows 2012 Server:
Choose Other New Records… in a right-click menu
Choose type «Service Location (SRV)»
Set the following parameters.
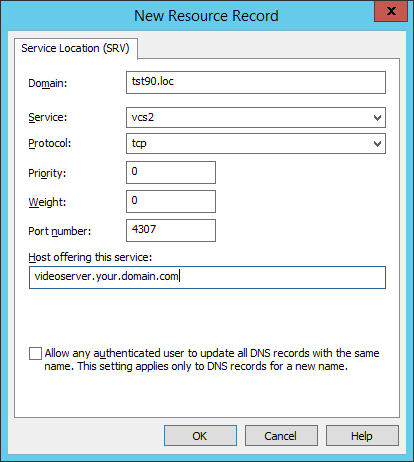
In this example the TrueConf Server instance has videoserver.your.domain.com address and port 4307. Please make sure that protocol name (tcp) does not contain underscores.