# Managing Calls through the Web Interface
To access the settings of the camera connected to the endpoint and view active video session parameters, go to the Conference control tab.
Depending on the parameters of the network that is used to connect the endpoint to your device, the video from your camera, as well as conference feed may be delayed.
If the PTZ camera image is freezing or if changing video layout takes longer than it should, it does not mean that the system is malfunctioning. Most likely, other meeting participants do not experience any issues.
# Camera Settings
There are two blocks for displaying feeds at the top of the page:
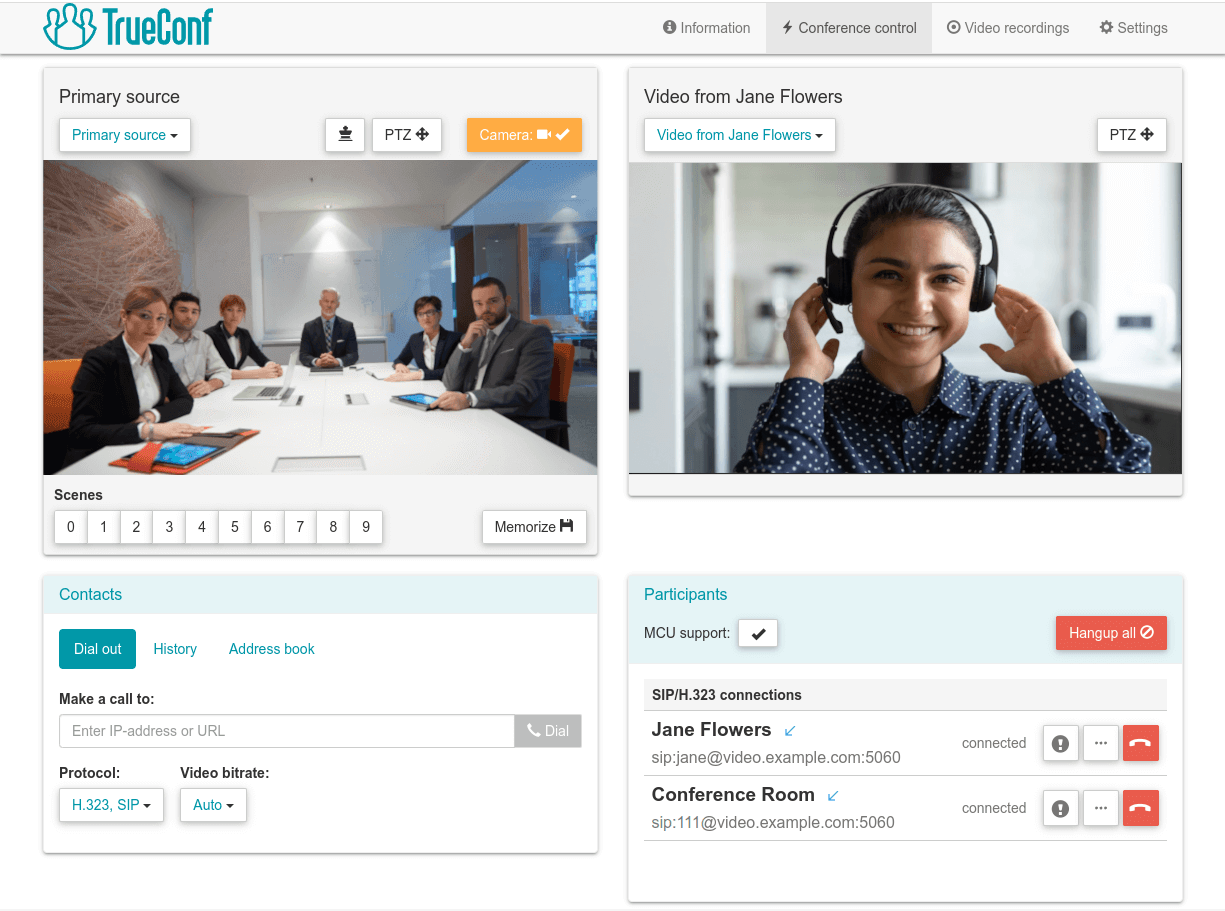
In each block, you can choose the following options in the drop-down list:
Primary source – preview of the video from the camera connected to TrueConf Group (self-view). It is also possible to control this device (available for compatible PTZ cameras). A user can also enlarge his/her video window in the layout with the
 button (only during a conference) and turn off the camera.
Presentation source: Preview content to be shared
Conference layout: Choose the current layout and control mixing settings for group conferences (available only when MCU module is enabled)
Main display: Display the layout on the screen connected to the endpoint and control the video feed from the endpoint camera
Video from <participant name> – display the selected user’s video feed and control their PTZ camera
Disable preview – clear the selected preview window.
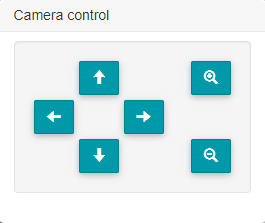
You can also control the PTZ camera connected to the endpoint and configure its presets in this section:
Choose Primary source in one of the drop-down lists.
Click the camera control button
 .
.In the control panel that opens, you can adjust the camera position and image scaling using the corresponding buttons:
To switch to the preset saving mode, click Memorize.
In Scenes list click any number to save the chosen camera settings under this number.
It is possible to save presets for different cameras if multiple cameras are connected to the endpoint.
# Call to a user
To call a user (or for this user to join ongoing group conference), use Dial out, History and Address book tabs in Contacts block:
On the Address book tab you can:
Select the list of users in the drop-down list:
Local – the local list stored on the endpoint
NDI – NDI streams available in the local network (the streams are searched for automatically when they are selected)
TrueConf MCU – the contacts imported when running the endpoint in integration with TrueConf MCU
LDAP – the contacts imported when integrating with an LDAP service
TrueConf Server – the contacts imported from TrueConf Server when the endpoint was run in integration with it
TrueConf Group – other TrueConf Group endpoints available in the local network (if this option is selected, such endpoints will be searched for automatically).
2. Switch to the group display of contacts from the selected list. Group editing will be available only for the local address book.
3. If the contact list imported from an external service is selected (for example, when integrating with TrueConf Server), you can save any contact to the local address book of the endpoint by using the  button.
# Edit the address book
If the endpoint address book is selected, it will be possible to create, edit  and delete
  users. Similarly, after activating the switcher Display by groups you will be able add, edit, and delete groups of contacts.
Any contact can be given up to 5 addresses of any type; it is also possible to specify the preferred call address (the call will be directed to this address by default when the button  is clicked).
There will be up to 10 contacts on a page; if the number of contacts is more than 10, one can use the buttons below for navigating the list.
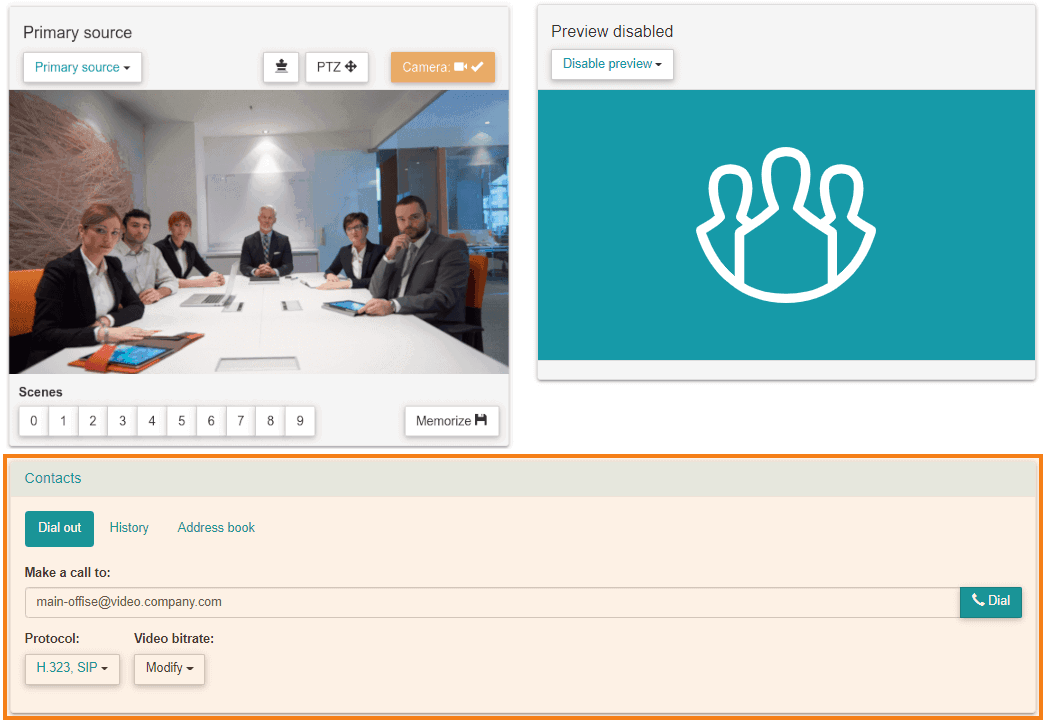
# Content Sharing
To stream a PDF document, image, video file or HDMI content to the conference:
Choose Presentation source in the list above.
Specify the content source in the Presentation source list:
To select a file previously uploaded on the endpoint, select the View file option in the list.
To upload a new file, click the Change button and select the Upload... option. Next, select a file in the opened window.
To stream content from a source connected to the capture card, select one of the HDMI inputs.
To stream via RTSP or VNC, select a stream from the list (this list is generated on the basis of the local address book of the endpoint).
To send an NDI source available in the network, select it from the list that will be generated automatically (similar to the address book).
To show content from the second camera, select it from the list.
If there are multiple connected cameras, you can specify which one should be used for sending video when configuring video capture devices. In this case any of the remaining cameras will be used for content sharing.
Now you can show the selected content to other meeting participants by clicking on the Share button. If the content sharing option was selected for the cases when a source is connected (check call settings), streaming will start as soon as the content is selected.
To scale and move around the image, click  above the preview window. In the control panel that opens, you can scale and move the image using the corresponding buttons.
It is possible to view the content from any source both inside and outside video meetings.
# Switching Layouts
In the group conference mode, you can manage users' video layouts. To do it choose Conference layout or Main display in one of the feed displaying blocks in the drop-down list.
In the preview unit that appears, you will see a preview of the current video layout. To choose a new layout, click Change layout and choose one of the layouts in the list.
For more details on the types of layouts used, see the "Managing Layouts" section.
# Mixing settings
When using the MCU module, you can adjust the mixing settings of the video streams on the go during a video call. To do it, choose Conference layout in one of the feed displaying blocks. There are several available options in the MCU setup drop-down list:
Restrict receiving presentations
Control the volume indicators displayed in users’ video windows
Change mixing mode
# List of Participants
You can view the list of users connected to the endpoint in the Participants block on the Conference control tab. This list automatically appears during a video call. To end a call for all, use the Hangup all button. You can also disable the MCU module in this section (if it was activated earlier).
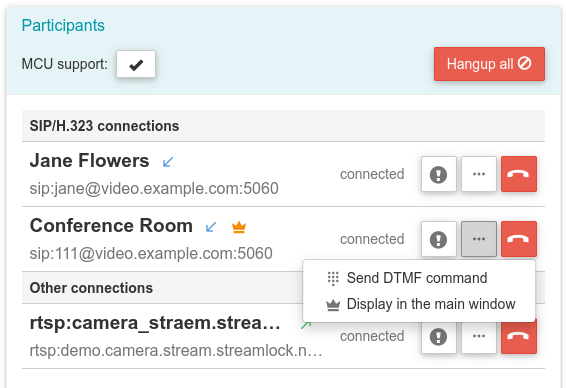
You will see the following information about each video call participant:
Username
Call direction (arrows are used to indicate incoming and outgoing calls)
Address (may be SIP, H.323, RTSP, VNC, NDI)
Icon
 if a participant is displayed in a spotlighted window
Buttons for managing a participant (disconnect, view connection information, dial, and display in the spotlighted window).
To send a DTMF command to a participant, go to the additional menu by clicking the ![]() button and select the Send DTMF command option. Next, enter the command in the virtual keyboard.
button and select the Send DTMF command option. Next, enter the command in the virtual keyboard.

To view detailed information about how to connect to a user, click  . Connection information will appear at the bottom of the page with detailed data on the connection protocols used, as well as incoming and outgoing video and audio streams. To hide this information, click again.
At any moment during a conference, you can manually spotlight the video window of the selected participant. To do it, select the Display in the main window option in the additional menu which is next to the participant’s name.
To assign the larger video window to the endpoint, choose Primary source and press the button in one of the feed displaying blocks in the drop-down list.
To disconnect a specific user from the video call, press the button  .
.
# PTZ Camera Control
To control a PTZ camera connected to the endpoint:
To switch to previously saved camera preset, choose Primary source and press the corresponding number in the Scenes list in one of the feed displaying blocks in the drop-down list.
Otherwise, take the following steps to set a new position:
Click
in the Primary source unitIn the camera control window you can pan, zoom in, and zoom out the image using the corresponding buttons.
To control the PTZ camera of a user connected to TrueConf Group take these steps:
In one of the feed displaying blocks choose the user you need from the drop-down list.
Press the
button above the video window of that user.In the camera control window that opens, you can adjust the camera position and scale the image using the corresponding buttons.
# Recording and streaming
At the bottom of the Conference control page you can see the buttons to control recording and streaming:
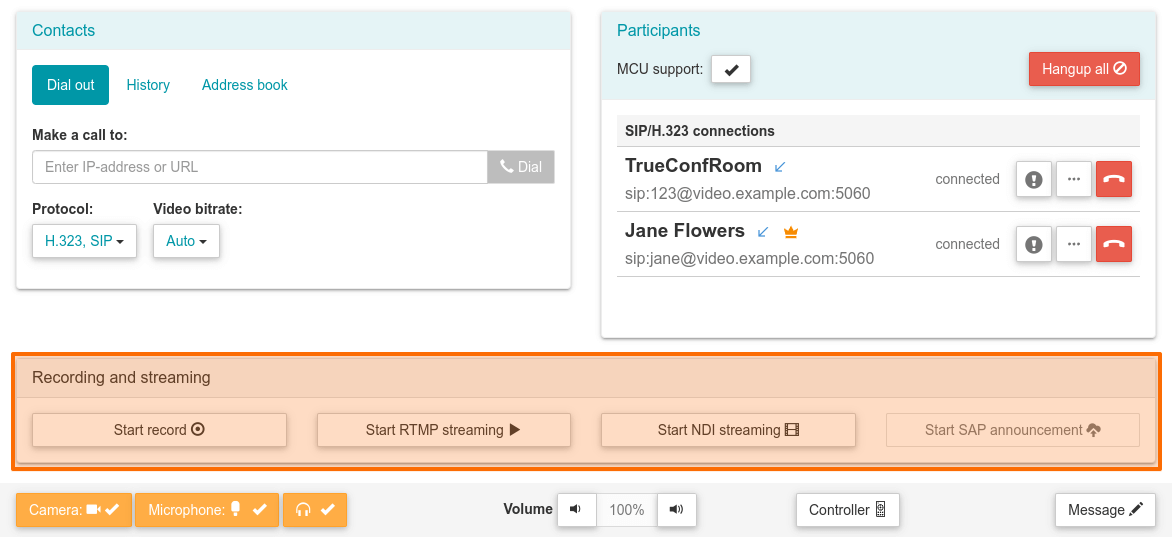
Use these buttons to start or stop video recording or streaming via RTMP, SAP, and NDI protocols. In this case, you can only use those streaming options that were previously configured using the remote control or in the Settings → Recording and streaming menu of the control panel.
In this case, you can start recording or streaming not only during video meetings. You can also start streaming or recording video from the camera connected to the endpoint before the video meeting (for example, for preliminary testing of video and audio quality, recording any video message, etc.).