# Setting up through the web interface
# Configuring HTTP/HTTPS connection
By default, the TrueConf Group terminal cannot be managed via the web interface. Therefore, you need to activate HTTP access using the on-screen menu. Similar HTTP settings will also be available through the control panel at Settings → HTTP → HTTP settings:
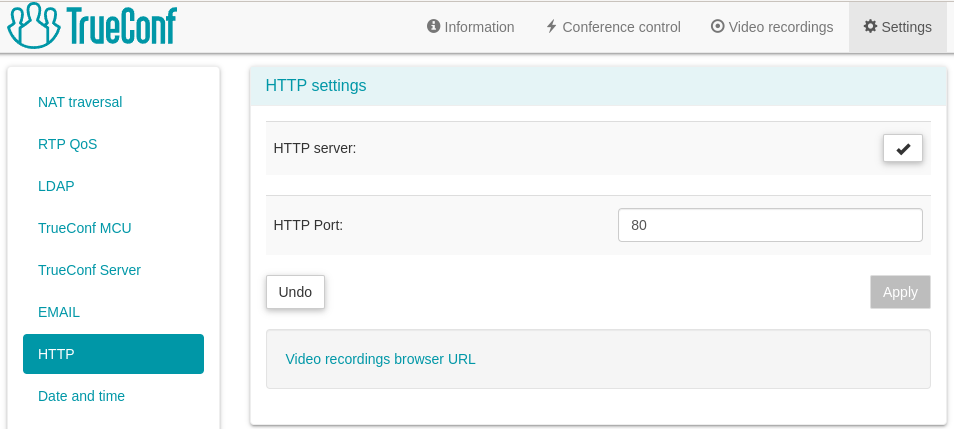
Also, there is a Video recordings browser URL link for providing direct access to conference records on the terminal.
To enable access to the control panel via HTTPS, go to the Settings → HTTP → HTTPS settings section:
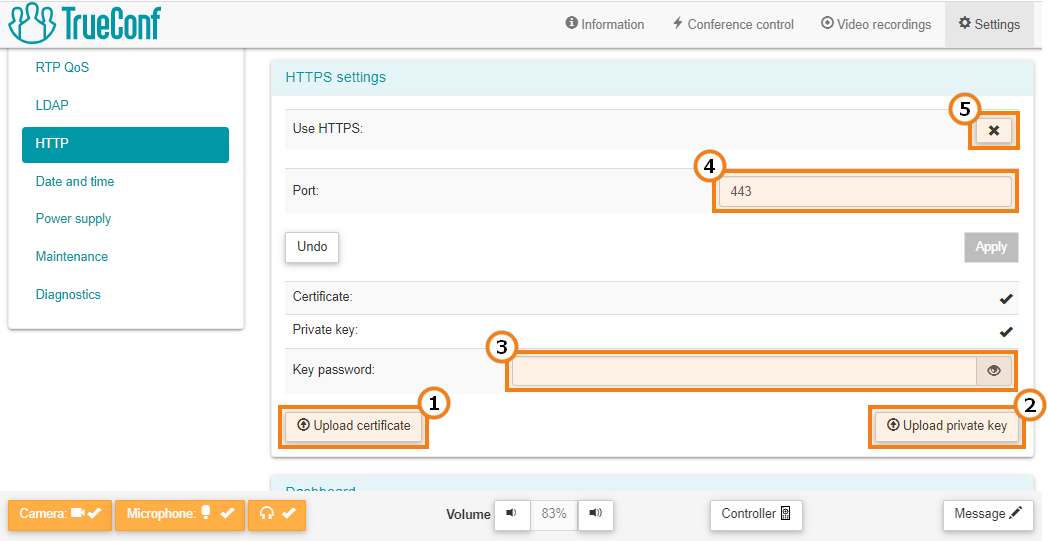
Download a certificate file with an .crt extension. If your certificate format is different, you can convert it.
Download a private key file in .key format.
Specify the password if it was set when generating the key.
If you need to set up an HTTPS port which is different from the standard 443 port, click on the Apply button.
Click the
 button to the right of the Use HTTPS: line to apply the settings.
There are three ways to generate a certificate file:
Create a self-signed certificate.
Generate a free Let’s Encrypt certificate on a Windows or Linux PC.
Buy a commercial certificate.
You can add certificate and key files only via the web interface; however, it is also possible to enable or disable HTTPS access with a remote control. To do it, go to the Configuration → Network → HTTP section of the endpoint menu and change the required parameter.
# Settings
To access terminal parameters, go to the Settings tab at the top. Almost all sections match the sections of the interface accessible directly from the control panel.
Here are several sections that are specific to the web interface or offer advanced features.
# Date and Time Settings
In the Date and time section of the control panel, in addition to the settings you can configure using the remote control, you can use a convenient calendar widget. It can be displayed by pressing the  button:

Use the widget buttons to:
 : Choose current date
 : Go to the time settings
 : Delete current date and time
 : Close the calendar widget
The widget also offers an interactive time zone map where, by hovering the mouse over each of the city circles, you can see its current time. To choose the desired time zone, simply left-click on the city:
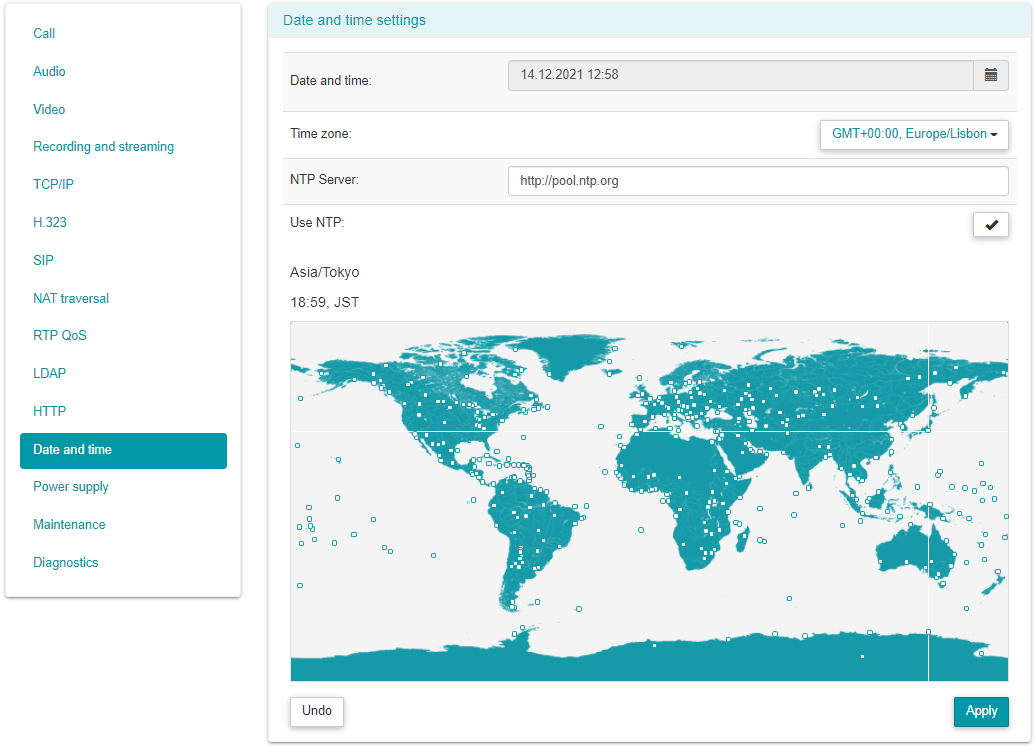
To save settings, click on the Apply button.
# Power Control
In the Power supply section, you can set up sleep mode (similar to remote control settings).
Power control also offers additional options:
Put the endpoint into sleep mode
Complete shutdown
Restart the endpoint
Restart video conferencing software without rebooting the OS.
# Software Administration and Upgrades
In the Maintenance section you can:
Upgrade firmware and license
Export/import settings
Настройка NTP не выгружается в конфигурационный файл.
- Go back to default settings.
To upgrade your firmware, you need to obtain the update file by contacting TrueConf managers. Choose this file in the Upgrade software:. You will see a warning about restarting the video conferencing system, and in a few seconds you will be able to work with the new software version.
Before updating the software, make sure that TrueConf Group is connected to a reliable power source so that the device does not suddenly shut down during the update. Please check that you have a stable network connection to the endpoint so that the control panel access is active.
To renew your license:
In the Licensing unit, click Download in Export hardware info:.
Contact the TrueConf managers and provide the saved configuration file. In response, you will receive your license file.
Choose it in the Upload license:.
In the Maintenance unit you also can:
Export/import TrueConf Group configuration and its address book, e.g., to transfer data between several endpoints
Upload the call history in JSON format (this can be useful when analyzing data using third-party utilities)
Clear the call history or the address book (please note that this action is irreversible ).
# Performance Diagnostics
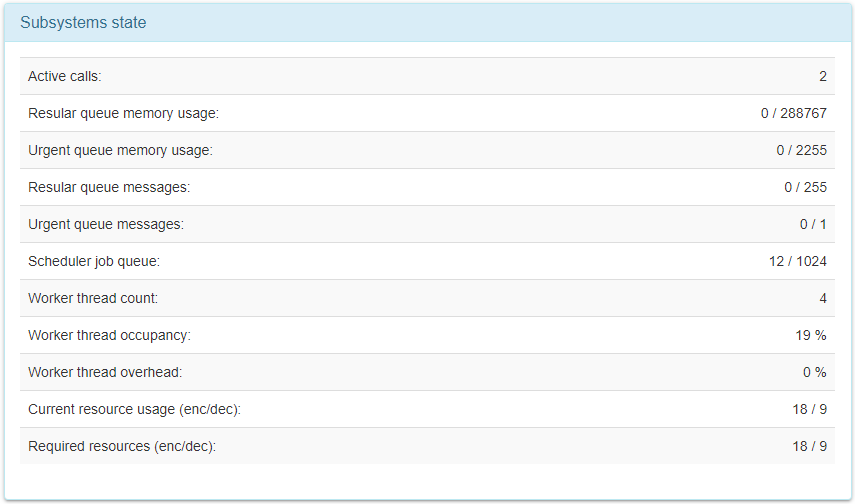
To check the status of the endpoint subsystems and view operation log files, go to the Diagnostics section.
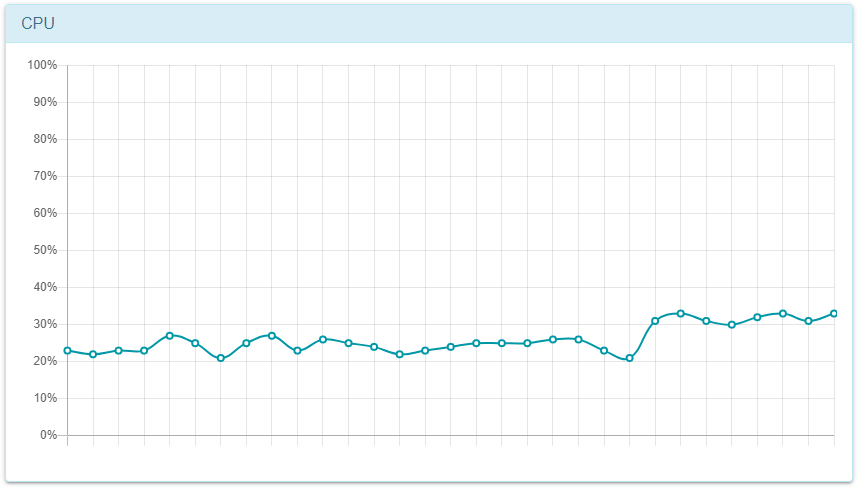
Subsystems state section displays detailed statistics on TrueConf Group resource usage:
CPUblock displays the endpoint CPU load graph in real time:
System log block contains endpoint log files. Please provide them when contacting TrueConf technical support.
In the Ping block, you can check whether a specific video conferencing server is available via IP and SIP/H.323 protocols. To that end, enter its IP address or DNS name (without specifying the protocol, e.g.,
video.company.com) in the Address field and click the Check button:
To check the route of packets directed to a particular server or the endpoint, specify the server IP address or DNS and click Check in the Traceroute section.
In the Network log unit you can record network traffic passing through the endpoint and analyze it using Wireshark (opens new window). Also, you should provide traffic recording files when contacting TrueConf technical support.