# Application settings
# Notifications
To adjust app notification settings, go to the Preferences section on the Notifications and sounds tab. Here, you will be able to set the following parameters:
For pop-up windows on your desktop: their location, number, and tracked events:

Display of notifications about events in the Pop-ups in the application section:
Audio notifications about various events (calls, conference events, and so forth) in the Sound notifications section. It is also possible to change the default sounds in the corresponding drop-down lists.
Regardless of the settings applied, you don't need to worry about notifications sent in the text chat interfering with your desktop broadcasting. All notifications are automatically hidden from the viewers of the broadcast while remaining visible to you.
# Connecting the application to the server
In the Settings → Network → Connection section, you can connect to your TrueConf Server instance or TrueConf Online cloud-based service.
If the Suppress direct connection box (disabled by default) is checked, point-to-point video calls will be routed through the server.
To check the list of available servers, click View list.
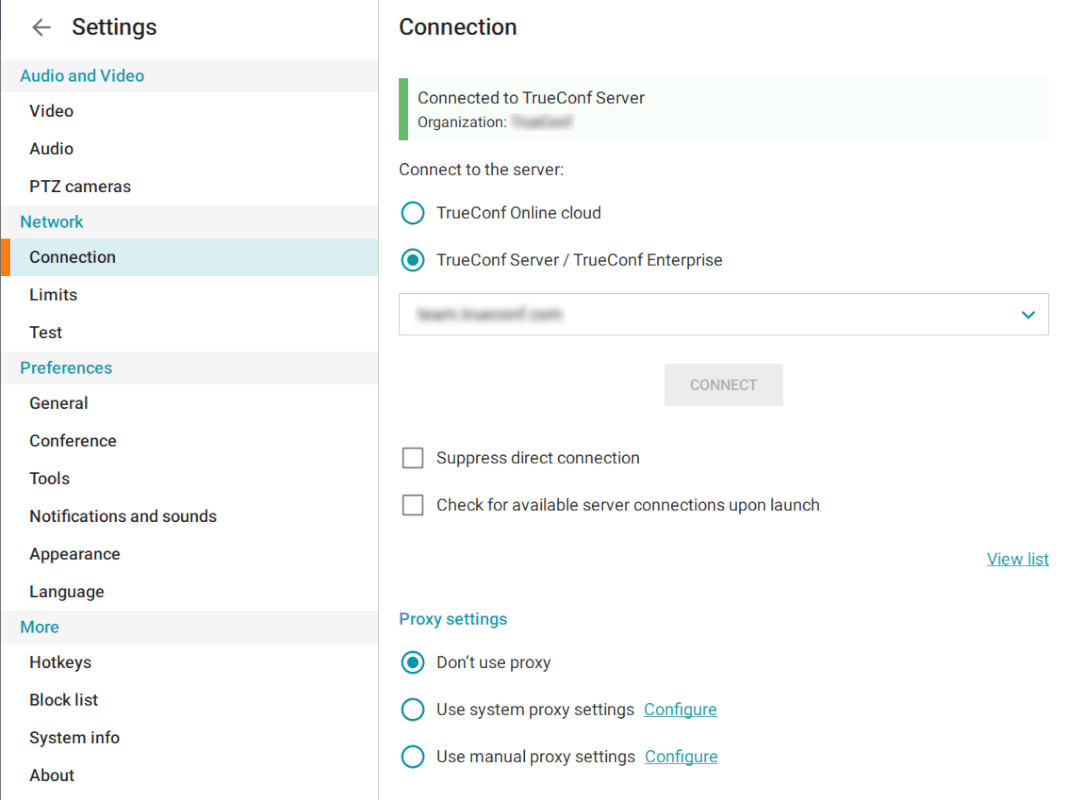
Also in this menu, you will find Proxy settings.
If you select the Use system proxy settings option and click Configure, you will be redirected to your operating system's proxy settings.
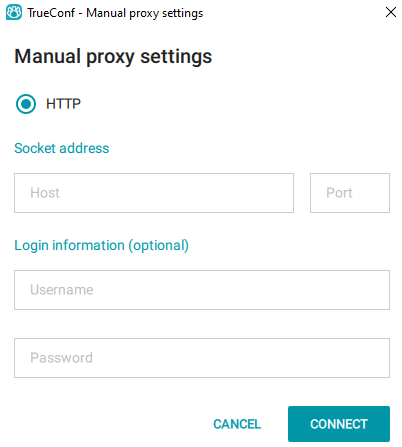
When you click the Configure link in the Use manual proxy settings section, a separate window will open for you to enter all the necessary data.
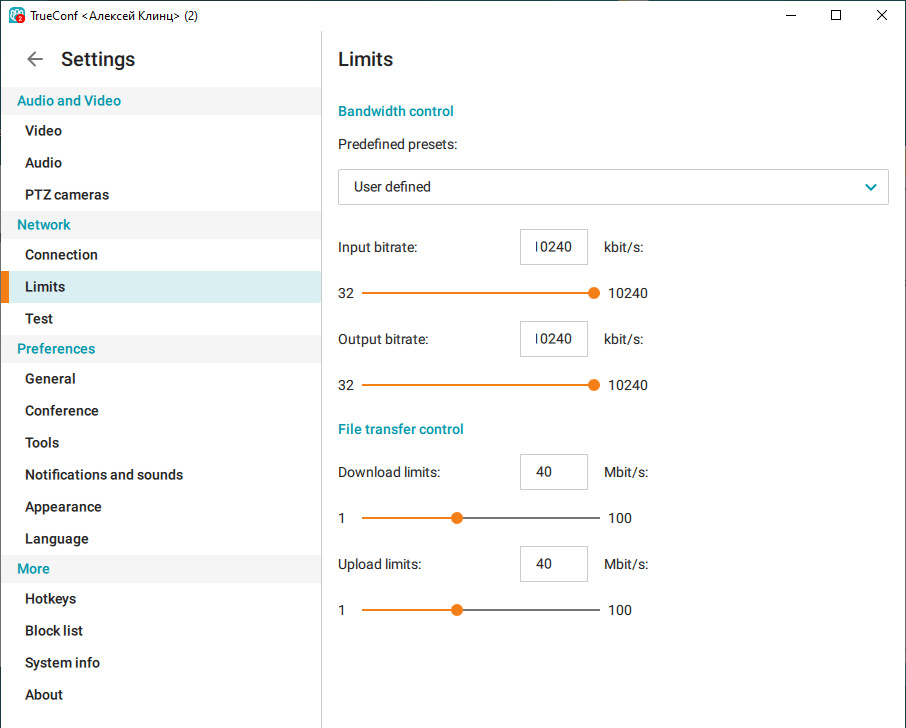
# Fine-tuning connection speed settings
If the communication channel with the TrueConf server and the network equipment being used permit, you can manually increase the incoming and outgoing bitrate in the Settings → Network → Limitations section in the client application. This may help to solve issues with video quality in conferences. These settings limit each incoming/outgoing stream, not the overall bandwidth for the conference.
You can check the available connection speed based on the communication channel test results in the Settings → Network → Test section.
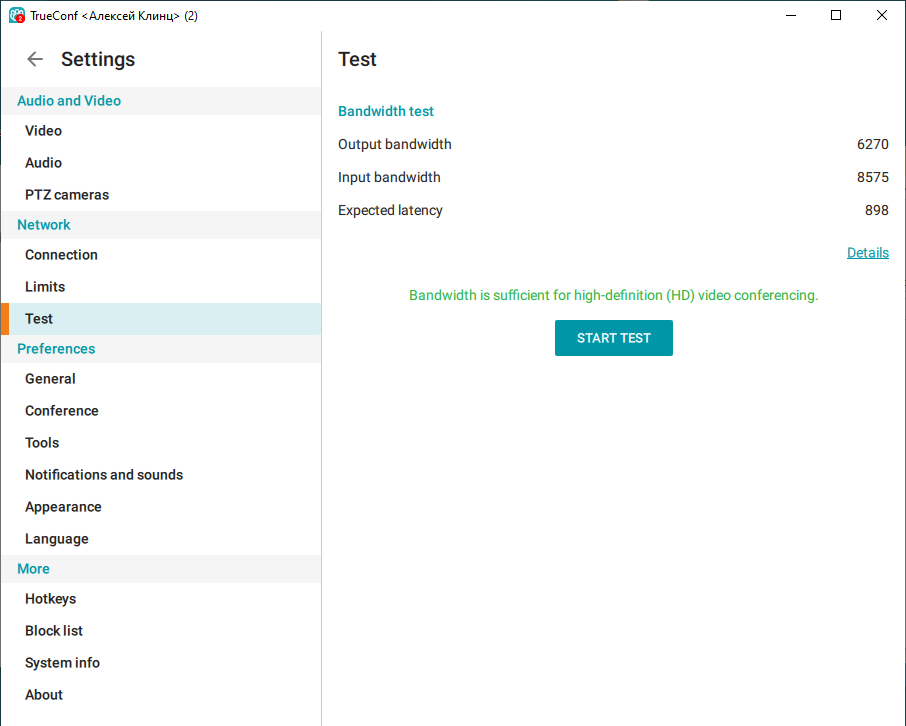
This test simulates real network load, and its results can indicate the actual speed and latency between the server and the client application. These figures may vary significantly from those claimed by your Internet provider. The recommended latency is up to 1000 ms; if it is higher, the delay will be audible to the participants.
# General preferences
In Settings → Preferences → General you can allow the application to launch automatically at your operating system startup (disabled by default).

The Sign in automatically checkbox (enabled by default) allows you to connect to the server automatically, without entering your login and password manually each time. The application will store login details for different servers and automatically sign in when you connect to one of them.
If you want to connect to a different server, go to the Settings → Network → Connection menu, enter your server address in the Connect to the server section and press Connect. Please don't sign out from the account on your current server using My profile → Sign out menu. Otherwise you will not be able to sign in automatically the next time you connect to this server.
If the user is inactive for a certain time, Away status is set automatically (in 15 minutes by default).
To change this setting, drag the slider to set your value (from 1 to 60 minutes).
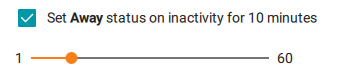
Uncheck the box Set Away status... if you do not want the application to record your activity.
In the Contacts section, you can select the line that will be displayed below users’ names in the list of contacts. The possible options include: TrueConf ID, Connection status, and Additional status.
# Energy Saving Settings
In the main preferences section, you can also manually manage the power saving settings on your device. Note that automatic switching of application features based on load and battery status is also supported on macOS (opens new window).
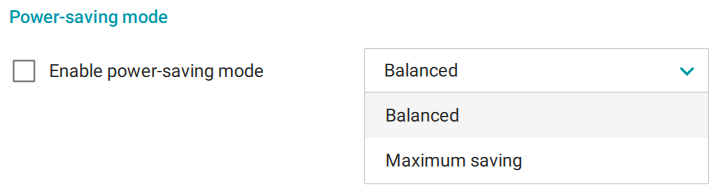
To activate, check the box next to Enable power-saving mode.
Select the power saving mode Balanced or Maximum saving.
About power-saving modes:
Balanced – disables the use of certain features of the TrueConf client application, particularly those related to the use of AI (such as background blur and replacement). When these features are used, the quality of the video transmitted will be reduced to decrease the amount of energy consumed.
Maximum saving – adds the device's webcam disabling to the Balanced mode's restrictions.
# Settings of the main menu panel
In the Settings → General → Menu section, you can customize the main application menu.
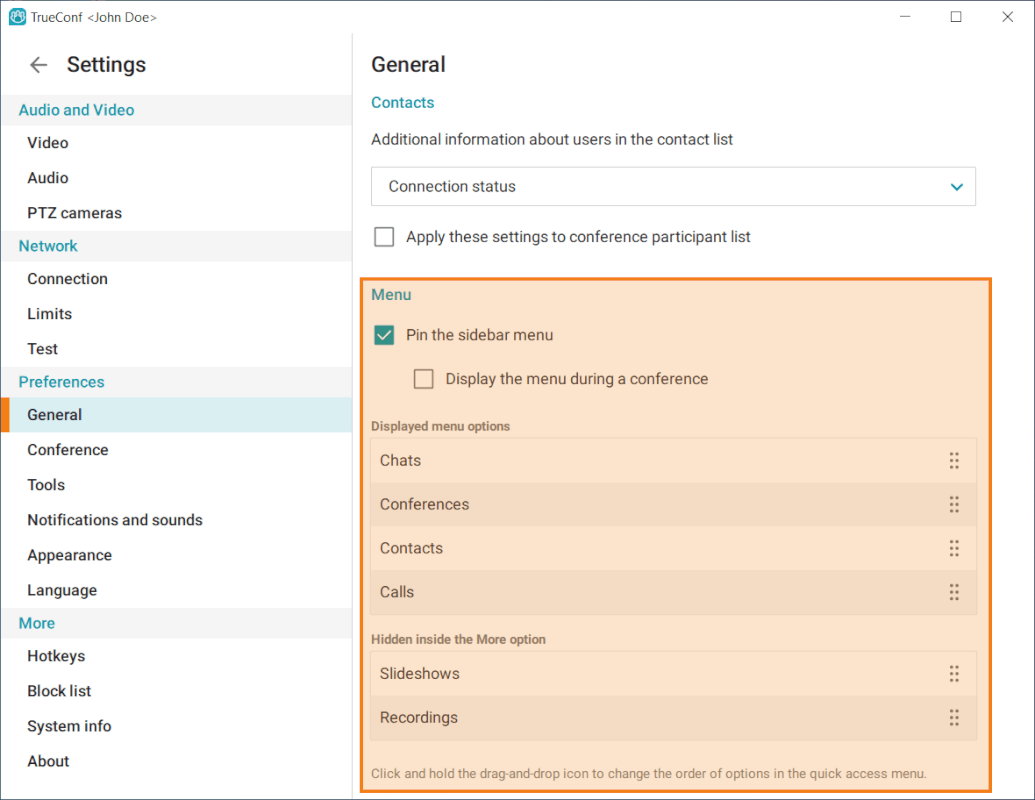
To make sure that the main menu is always displayed in the left part of the application window (except when you are in a meeting or have accessed the settings menu), check the box Pin the sidebar menu (checked by default). If the box is unchecked, the menu will be hidden under the button  .
.
If you want the menu to be displayed during meetings as well, check the box Display the menu during a conference.
In this section you can also change the order of options that are constantly available in the main menu. It is possible to hide additional options by moving them in the Hidden inside the More option list. To move an option to the required location, click and hold on the button  which is opposite to the option name and drag it.
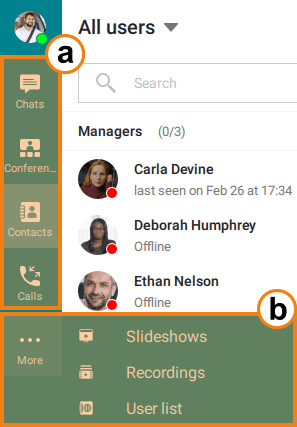
Then the options from the Displayed menu options block will be always displayed in the main menu, while the options from the Hidden inside the More option block can be found in the drop-down list that can be opened by clicking on the More button.
If the box Pin the sidebar menu is unchecked, the menu will include the options from both sections. However, the options from the Others block will be displayed below others under the separator bar.
# Conferences
Go to the Settings → Preferences → Conference section to configure conference and call settings:
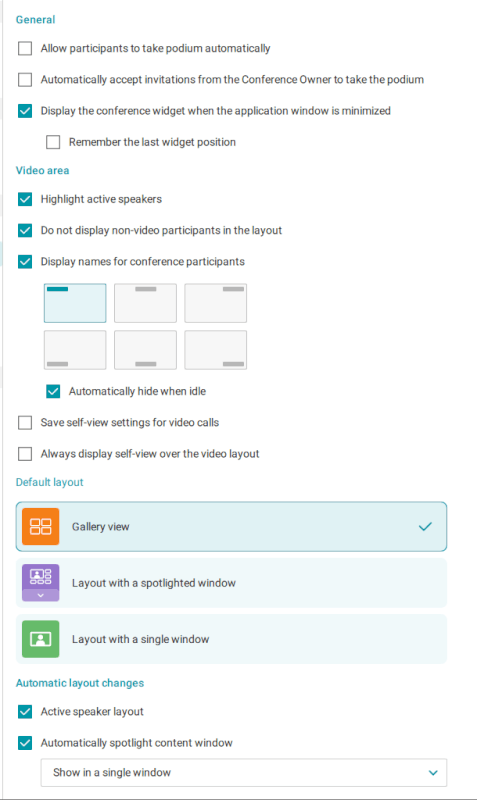
In this section you can also find the following settings:
Automatically accept podium requests from attendees in any of the conferences where you are a moderator (or the owner)
Automatically accepts podium invitations
display of the conference widget with the option to remember its last position on the screen;
Spotlight the active speaker’s video window
Automatically remove non-video participants from the conference layout
rules for displaying participant names in the video layout with the option for graphical selection of the name's position in the layout window;
saving the display settings of your own video – in this case, when you change the position and size of your self-view, the application will remember and apply these values for all calls and conferences. By default, your video is displayed in the bottom left corner;
Display the self-view video window over the layout – if this checkbox is marked, your self-view video will be displayed in a separate layout (this does not affect the layout received from the moderator)
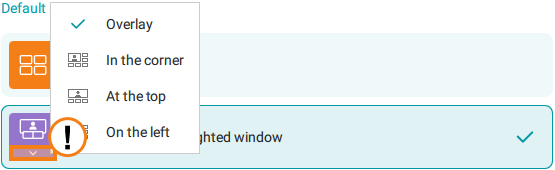
selection of the local video layout that will be used by default. The Layout with a spotlighted video option also includes additional settings for displaying the spotlighted window and other video windows.
# Visual styles
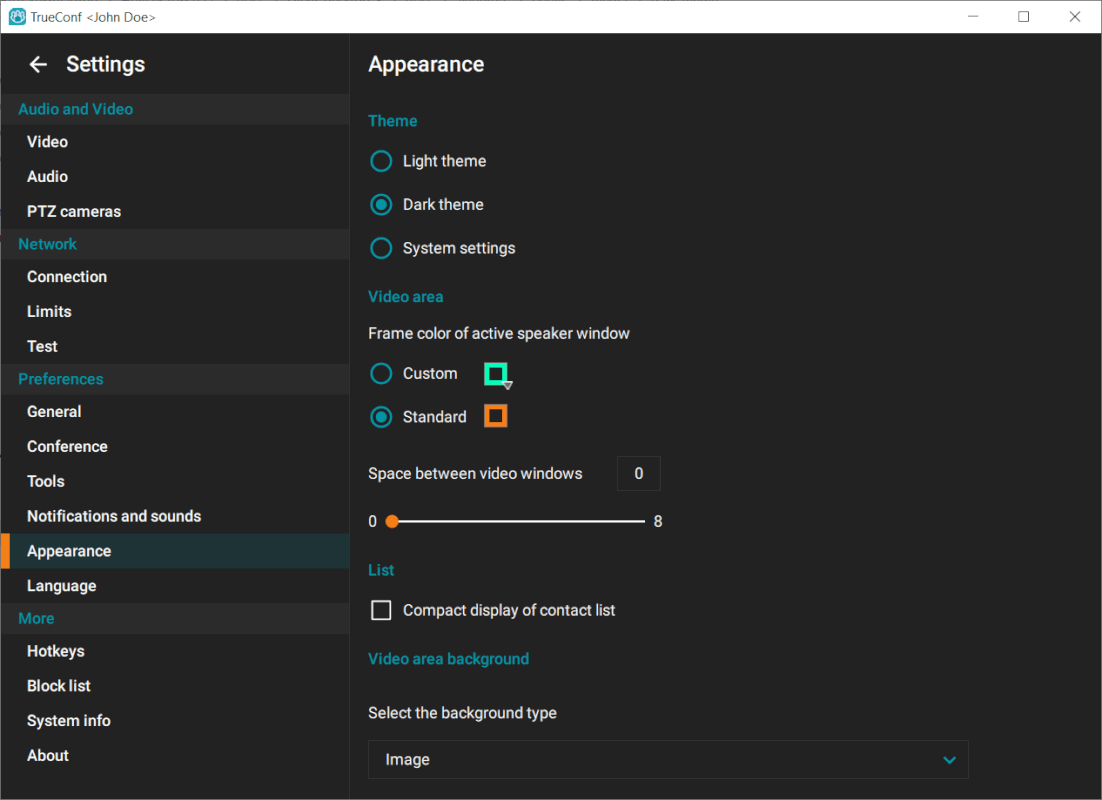
Go to Settings → Preferences → Visual styles to configure the look of your application.
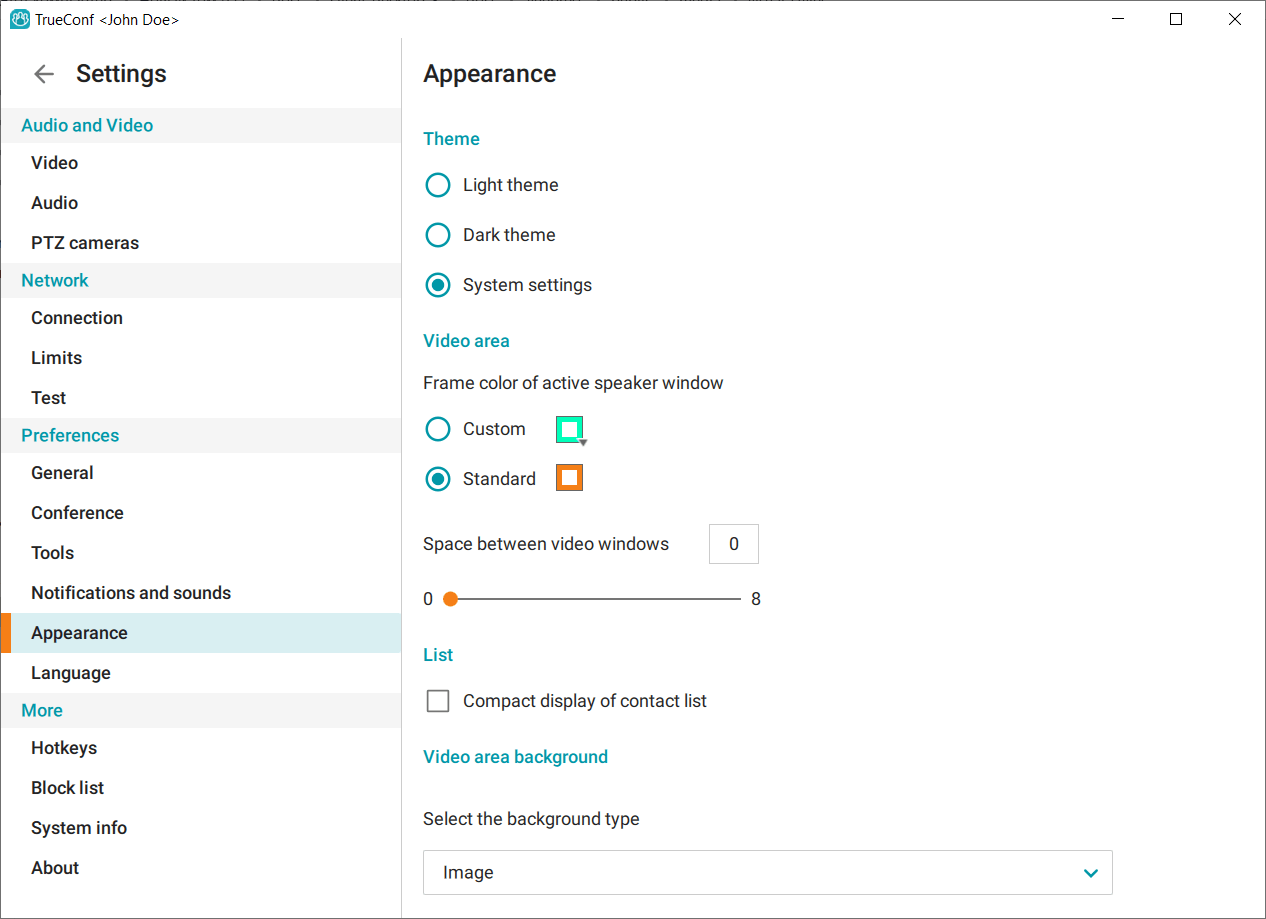
Switch to the Dark theme option to change the application to dark mode.
Use Custom option in the Videoarea section to customize the frame color of active speaker window (orange by default).
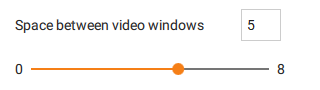
If you want to change the space between video windows, move the slider in the Videoarea section (0 pixels by default) or set your value in the corresponding field.
Check the Compact display of contact list box to hide user avatars.

To change the layout background, go to the Video area background section. You can choose one of the default backgrounds or set a custom one by uploading an image from your computer (click on the button  ).
).
# Hotkeys
You can control the application using hotkeys. The list of all combinations is available in Settings → More → Hotkeys.
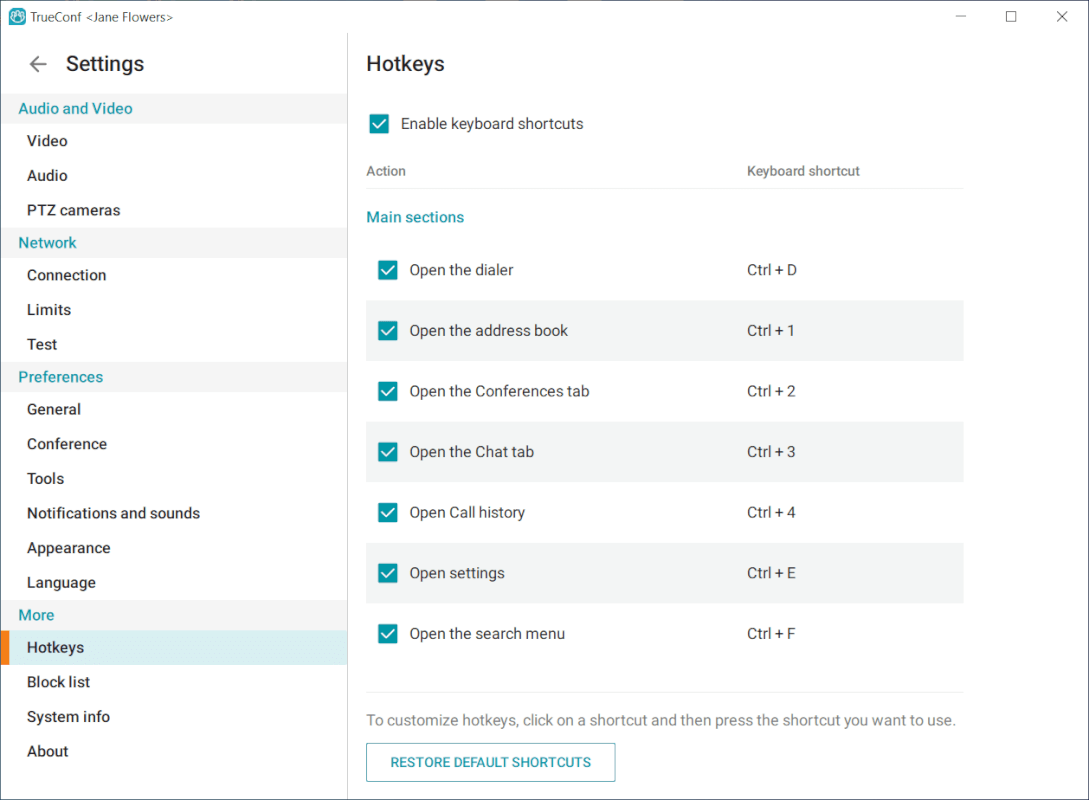
Uncheck the box next to the action name in the list to disable a given keyboard shortcut. To completely disable any combinations in the application, uncheck the box Enable keyboard shortcuts.
You can also customize the hotkeys.
To do it, take these steps:
Left-click on a shortcut.
Next, press the new keyboard shortcut.
To re-assign hotkeys, try to avoid system shortcuts such as Ctrl + C, Ctrl + Alt + Delete and others. If you specify the shortcut which is already used, you will be offered to re-assign it (assign this shortcut for the new action and automatically select a different shortcut for the old action) or cancel changes.
- New keyboard shortcuts are not saved automatically, so after configuring them, press the Save button.
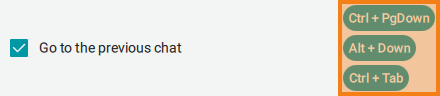
Please note that some actions have fixed groups of hotkey combinations. If necessary, you can disable one or more values by clicking the left mouse button.
If necessary, you can revert to the changes you made earlier (even those that were previously saved by you) by clicking the Restore default shortcuts button.