# Chat
Instant messaging (or chat) allows users to exchange text messages or files during video calls or group video conferences. You can use chat not only during video calls or conferences, but every time you need to send a message to other users.
If you sign in on a different device, your previous chat history won’t be available.
If your TrueConf Server instance is below v. 5.0, chats will not be synchronised across your devices.

With this messaging platform, you can:
Send text messages
Edit, forward, and delete text messages
Please note — you can only edit those messages that were sent less than 48 hours ago.
[Search for words and phrases] (#search-of-message) within chat messages
[share files] [#send-files]
Create a conference
All chat messages can be edited. To do it, right-click on a message and select the Edit option. An edited message will be marked as edited (the date of editing will also be specified).

If you right-click on a message, the following options will be available:
Reply
Edit
Forward
Copy
Delete
Select messages (e.g., you can select multiple messages and delete, copy or forward them in bulk).
Multiple messages can be selected in the same way the text is selected. To do it, left-click on a message and drag the mouse up or down.
Click on the button  in the upper right corner of the application to access additional features:
View additional information about a user or a group chat
Check the list of all sent files
Clear chat history
Delete a chat (you can also delete it for the other user by marking the corresponding checkbox)
Block a contact.
Please be careful when clearing chat history or deleting a chat. This action cannot be reversed. Even if you are added to this chat afterwards, you will not be able to view previous messages because all chat history has been removed.
The same group chat will be used for a virtual room or a recurring conference. It will be synced with the conference.
# Message formatting
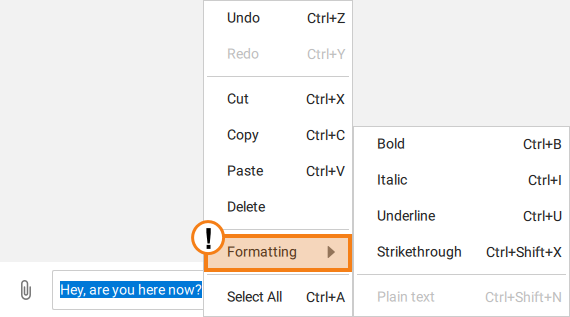
To format a message, right-click on the selected text in the input field and in the Formatting option select the correct format: bold, italic, underline, strike-through or use Markdown (opens new window). The following special characters are supported:
**text**— bold
__text__ — italic
~~text~~ — strike-through.
You can also format the text you need by accessing the context menu, which is called up by pressing right-click on the chat line:
You can also use hotkeys to quickly format a chat message.
# Searching for messages
To find a chat message click the  button which will open an input field. Enter the text in the input field and, as you type, the messages matching your query will be highlighted.
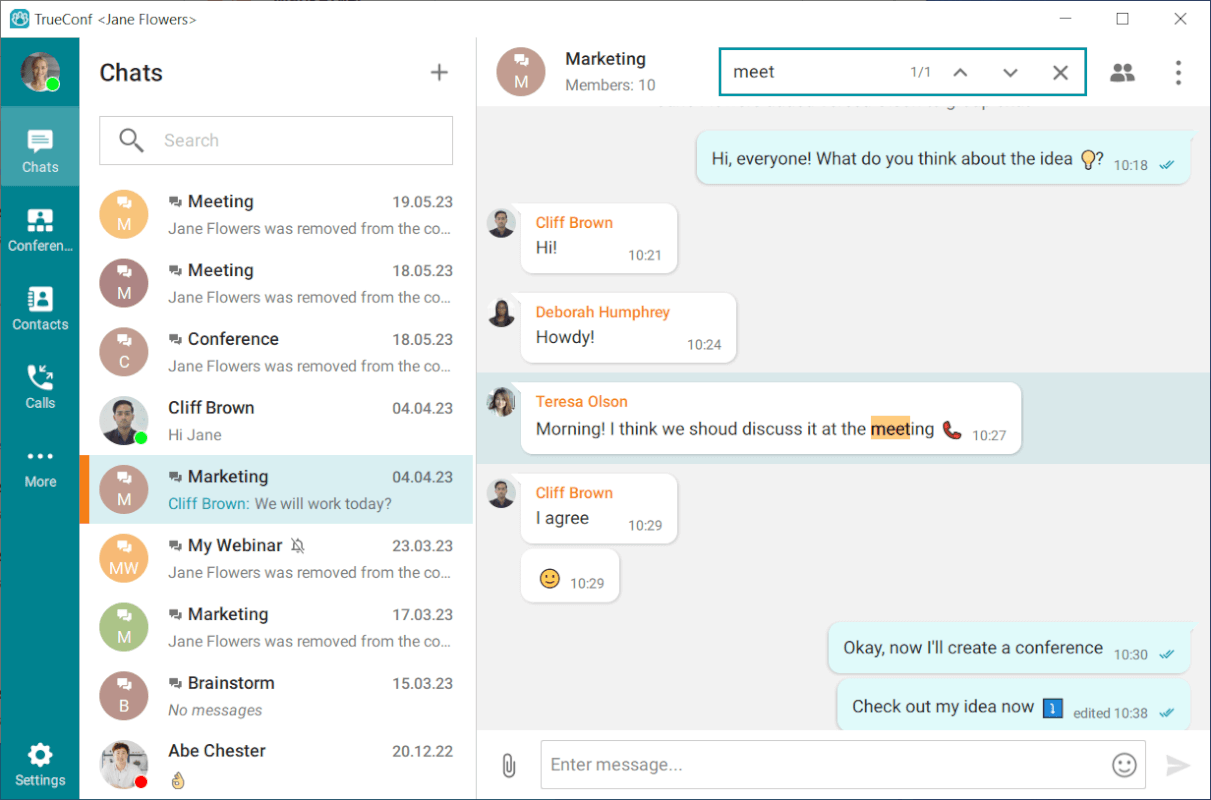
If multiple messages have been found, you can switch between them with these buttons:  and
and  . Right next to these buttons, there is a counter indicating the number of messages that match your query.
If you double-click on a chat in the list, it will be scrolled down to the very bottom.
# Sending files to a chat
To send files simply drag and drop them to the chat panel (you can also send a folder with files, including a nested folder). Alternatively, you can click on the paperclip icon on the left side of the input field.

You can select multiple files by pressing CTRL or clicking on the Add button in the preview window.

By default any image you send will be compressed. To send the image in the original quality, uncheck the box Compress image.
You can also type an additional message in the Description field. This message will be sent together with the files.
If users are not currently online, you can send them an offline message, they will get it immediately when they are online.
The default location of downloaded files is:
%USERPROFILE%/Downloadsfor Windows/home/$USER/Downloadsfor Linux~/Downloads/for macOS
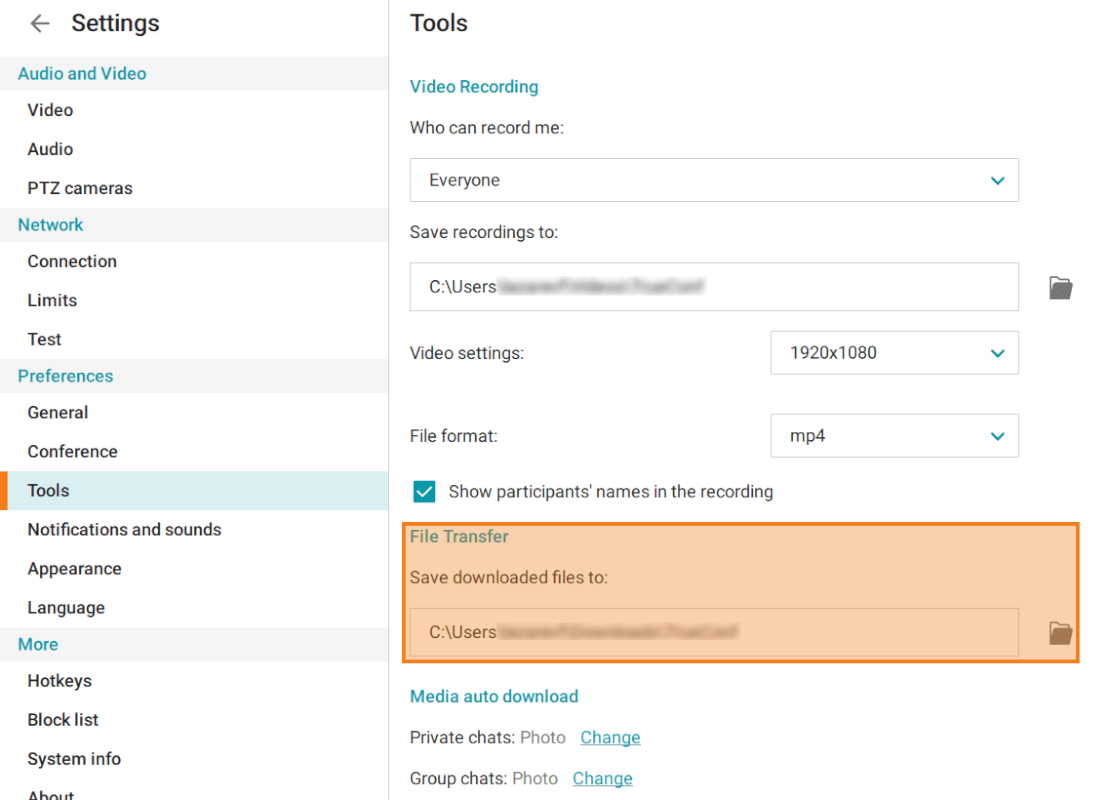
To change the download folder, go to Settings → Preferences → Tools menu in the application window. Then click the  button in the File Transfer section and specify the required folder.
A subfolder named TrueConf, which will store all chat attachments, will be automatically created in the folder selected for downloaded files.
If you want to open the files sent to the chat, click on the button and choose Files.
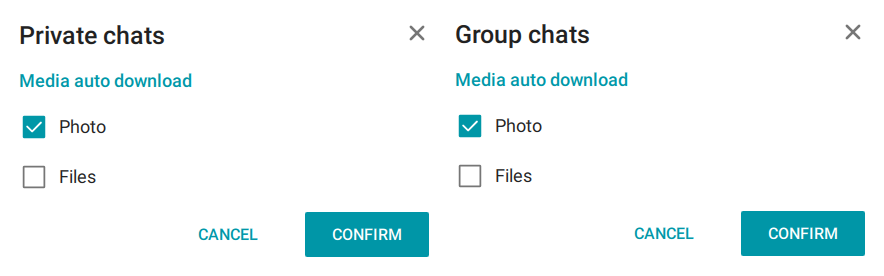
If needed, you can configure the automatic download of files in chat, or disable it. To do this, go to the Tools section and navigate to the Media Autodownload block. Here, you can set up file autodownload for individual and group chats by clicking the Change button and selecting the necessary options from the context menu.
# Working with PDF Files
You can open PDF files sent to you using the native document viewer tool; however, you must have the Ghostscript plugin installed on your computer to do this.
You can read more about the configuration in the "Content Sharing" section.
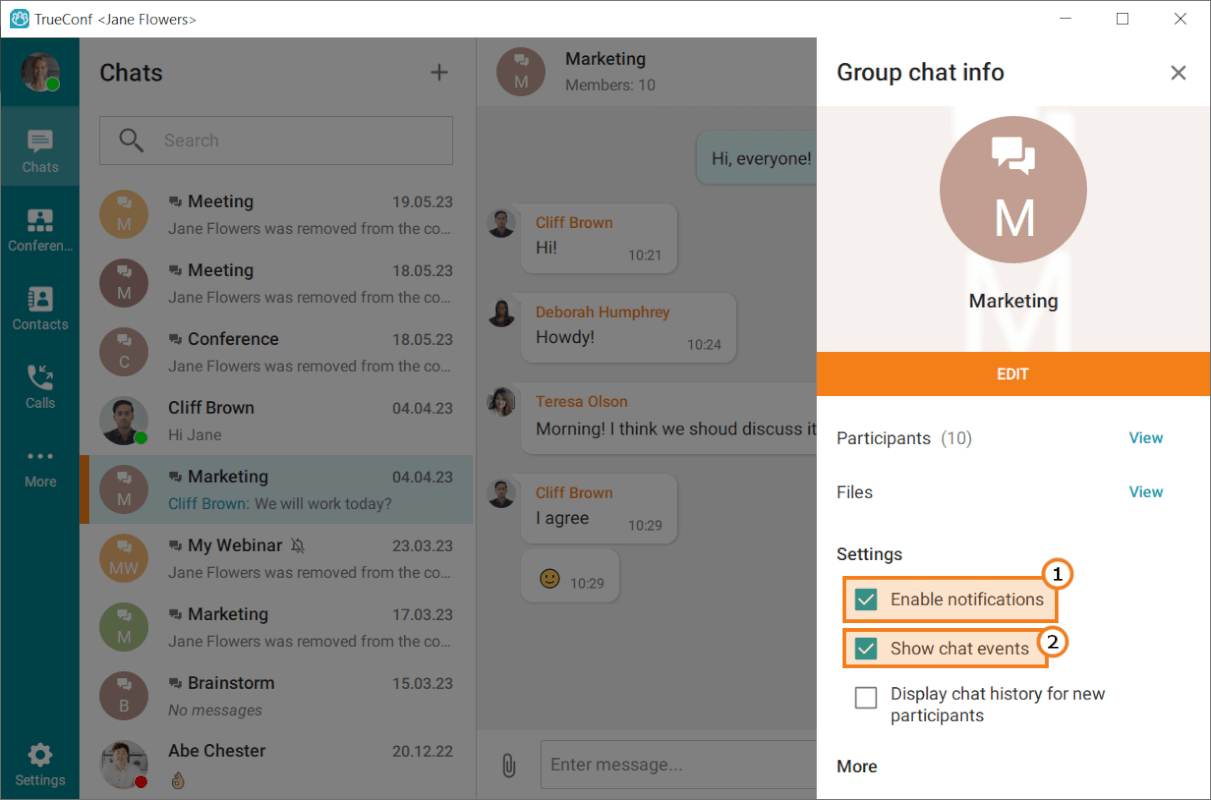
# How to disable notifications
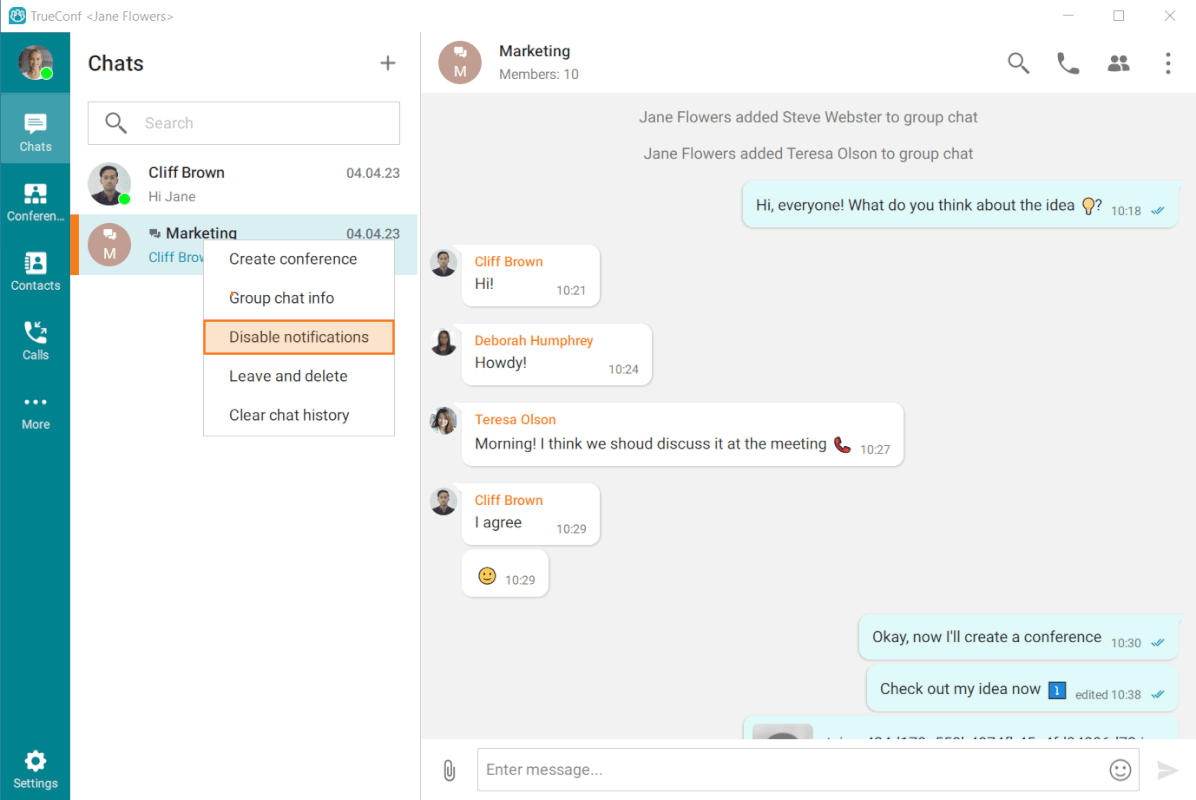
You can disable notifications about chat messages (for both group and private chats). To do it, right-click on a chat and select the Disable notifications option in the context menu.
To activate this feature, you can also click on the button in the upper right corner of the chat window and select the same option in the menu:
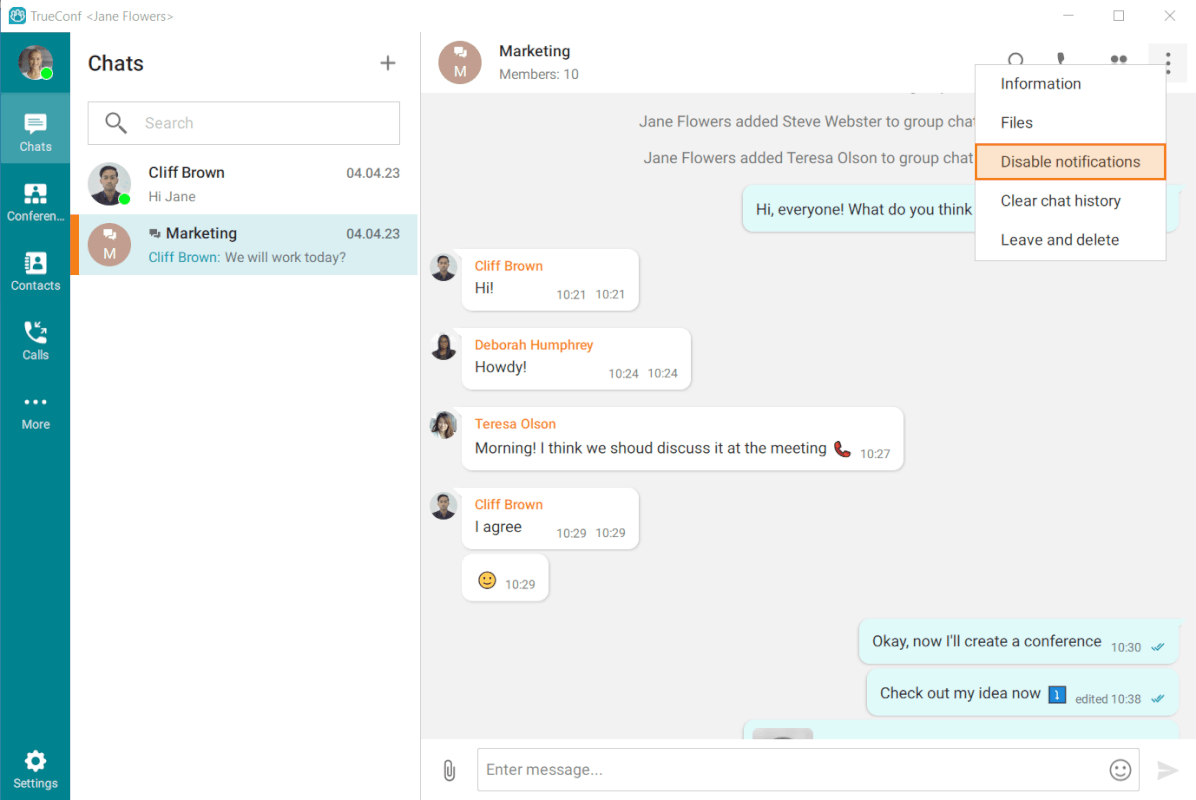
The notifications from the selected chat will no longer be displayed. You can enable these notifications in a similar way.
This configuration is local which means that it applies only to the selected instance of the application without being bound to the user account. For example, if you disable notifications for a chat in a desktop application, they will still be displayed in a mobile application or in a desktop app installed on a different computer.
# Group chats
To create a group chat, select the Chats option. Then, click on the  button, enter the chat name, and upload the chat avatar (optional). Then click on the Create button. In the pop-up window you can select and add participants to the chat from your address book.
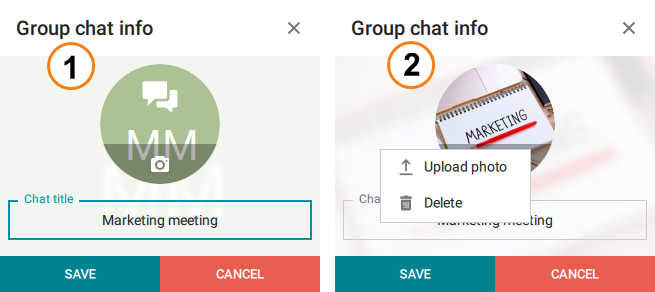
The owner of a group chat can change its title (1) and avatar (2). To do it, click the button and go to the Information section.
In the Information menu, you can configure additional chat settings:
Message formatting
Visibility of chat history for new participants
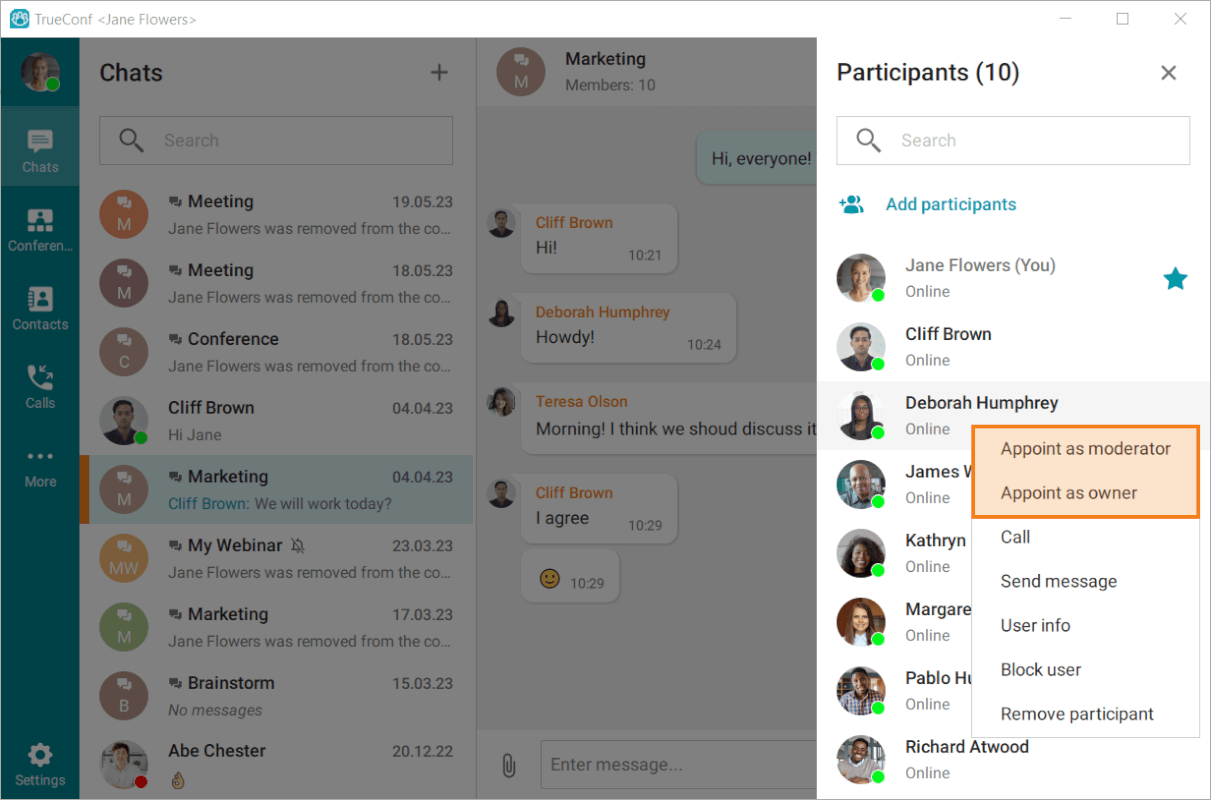
The owner of a group chat can give moderator rights to other chat participants; it is also possible to fully transfer chat ownership. To do it, click on the  button and right-click on the selected participant. Choose Appoint as moderator or Appoint as owner. The moderator can add or delete participants, appoint new moderators, delete messages, change the chat name and select a new chat avatar. The chat owner will be marked with this icon
  . The moderators (if there are any) will be marked with
  .
.
Only the owner can delete a group chat for all its participants.
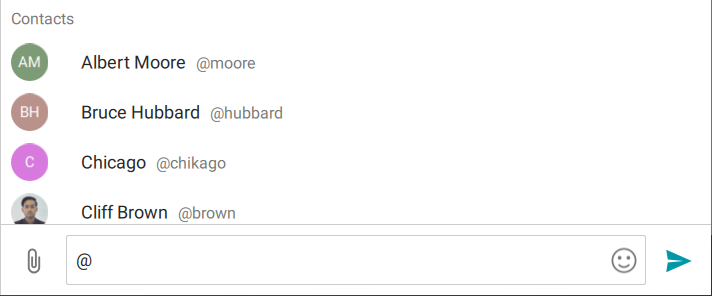
# Mentioning a contact in the chat
You can mention a user in a message by specifying their TrueConf ID prefixed with the @ character. As a result, the user's name, which links to their profile, will be displayed in the message.
# List of users who have read the message
The sender of messages in a group chat can see who among the participants has read each message at any given time.
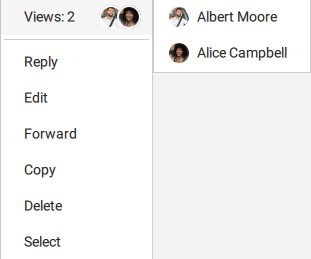
This feature has a number of specific limitations:
This feature is applicable for chats with up to 20 participants.
The message must not be older than 7 days.
# Hotkeys
These hotkeys are available only in the Chats window. To view other hotkeys, please check the settings.
Up and down arrows will later be referred to as ↓ and ↑.
If you are using macOS, press ⌘ (Command) instead of Ctrl .
# Formatting selected text
Ctrl + B— boldCtrl + I— italicCtrl + U— underlineCtrl + Shift + X— strike-throughCtrl + Shift + N— clear formatting
# For chats
Alt + ↓,Ctrl + Tab,Ctrl + PageDown— switch to the previous chatAlt + ↑,Ctrl + Shift + Tab,Ctrl + PageUp— switch to the next chatEsc— leave the chat or undo the current action.
# For messages
Ctrl + ↑andCtrl + ↓— select a message for a quick replyCtrl + ↓— cancel the reply↑— edit the last messageDel— delete selected messages.
# In the chat list
These hotkeys work only if no chats are opened.
↑and↓— navigationEnter— open the selected chat.