# Conference management
# Inviting users to the conference
You can add participants from your address book right when creating a conference as it is described in the corresponding section.
Moreover, if you are the moderator of an ongoing conference, you can invite participants to join it. There are three options to do so.
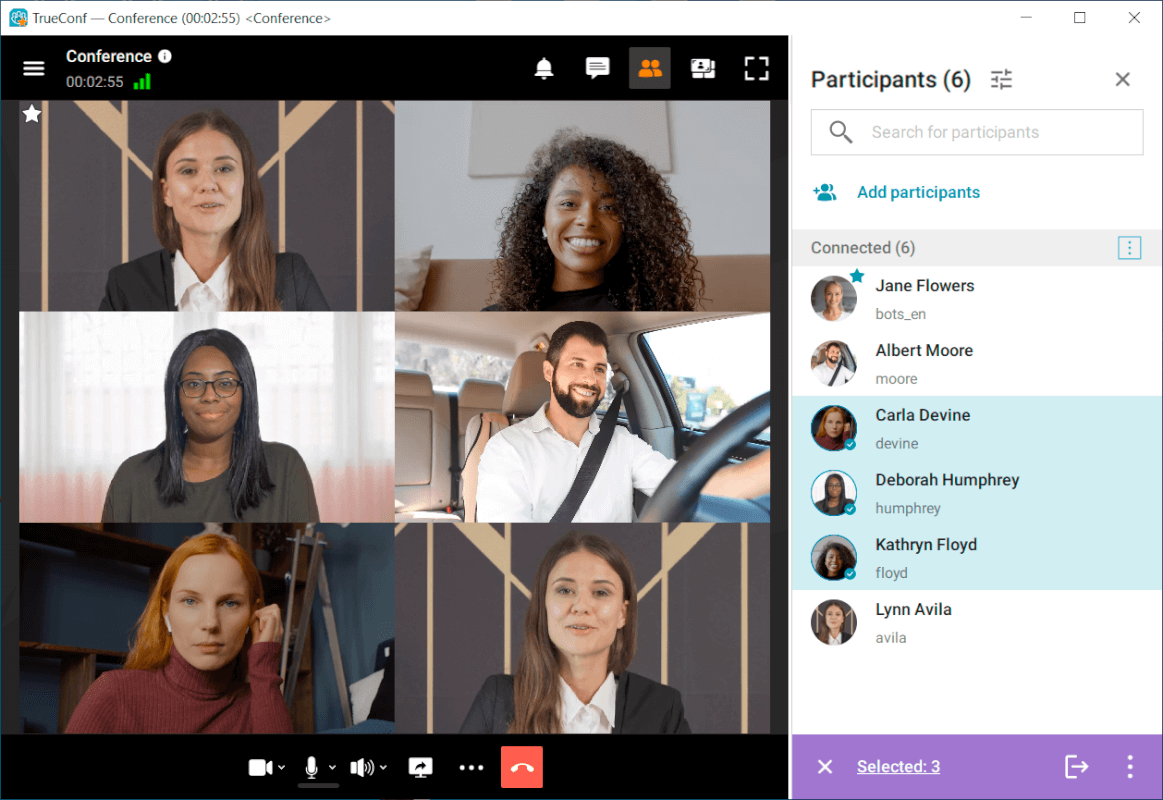
Go to the list of participants using the button
 and click Add participants.
If you call any user during a conference, this user will be invited to join your current conference.
If you are the owner of the conference or have operator rights, you can go to real-time meeting management, open the context menu (a), navigate to Participant List(b), and invite users using the
 button located to the right of the search bar (c).

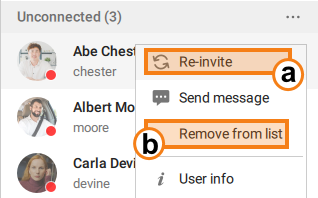
Participants who have not joined the conference will be placed in a separate group Unconnected. You can re-invite (a) or remove (b) any of them using the context menu, which is brought up by right-clicking:
You can also clear the entire list at once by using the corresponding option in the menu, which can be accessed by pressing the  button:

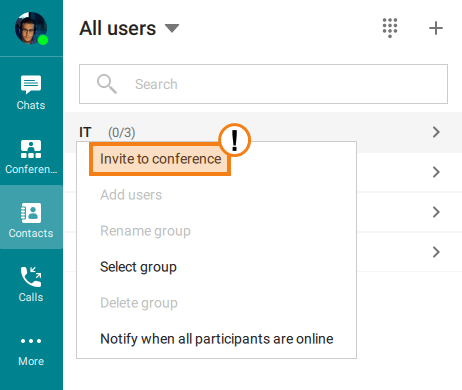
# Inviting a user group to the conference
To add a user group to a conference, go to the group list display mode and click Invite to conference in the group context menu. You will enter the conference creation menu.
In the same way, you can invite the group to an active video meeting if you are the meeting moderator.
To add a new participant or group without leaving the conference window, you need to go to the list of conference participants and click Add participants.
# User group actions
Click on the button  to select the required action over conference participants.
The same button is available for the list of users who did not join the conference. It will allow you to re-invite all them to the meeting.
You can also select the participants to whom an action should be applied. To select a participant, right-click on this user’s avatar in the list.
You can sort conference participants using the  button by:
Alphabetically. There are two options - ascending (A-Z) and descending (Z-A).
Roles. First, the conference owner is displayed, followed by appointed moderators, then users without a role, and listeners.
Position in the video layout. In this case, the list will be linked to the location of the user's window. When the position in the video layout changes, the conference participant will also move in the list.
Based on the enabled microphone. Then, everyone with the microphone turned on will be placed above the others. Each subgroup will be sorted alphabetically.
Additionally, you can check the Consider participant activity box. In this case, participants will be further sorted based on who is performing specific actions during the conference, such as speaking or broadcasting content.
# Disconnecting participants
The moderator can disconnect a participant or another moderator during a meeting (removing the conference owner is unavailable). To this end, right click on the user name and select Disconnect participant in the list of conference participants (don't forget to go to the list of participants rather than the address book).
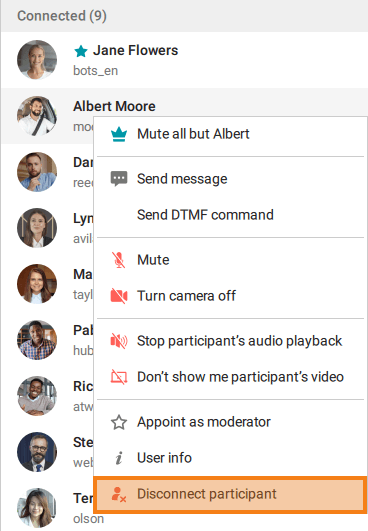
You will need to confirm the removal of a participant by clicking on the corresponding button. Please note that if you have marked the Do not allow to rejoin box, the user will be unable to join this meeting later.

# Appointing a single speaker
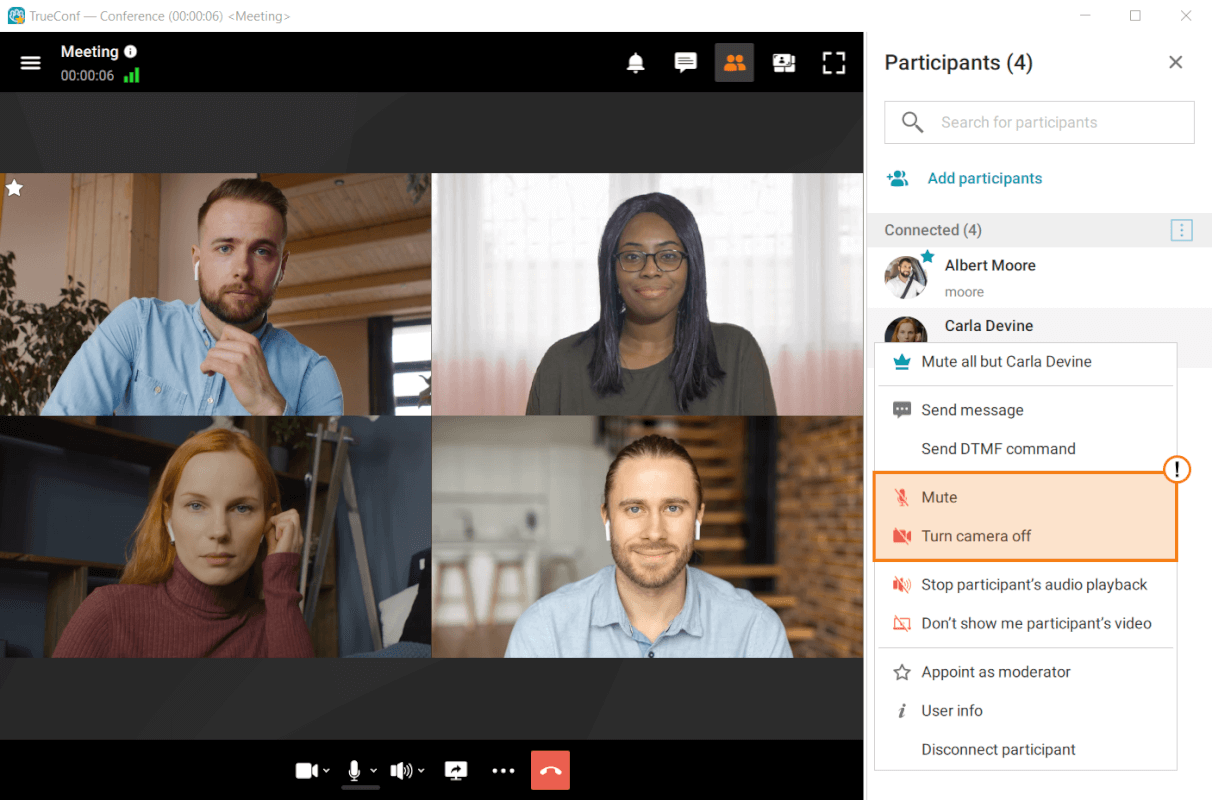
During a conference you can appoint a conference participant as a single speaker. To do it, right-click on this user in the list of participant and select the Mute all but [name] option in the context menu; here [name] is the name of the selected participant.
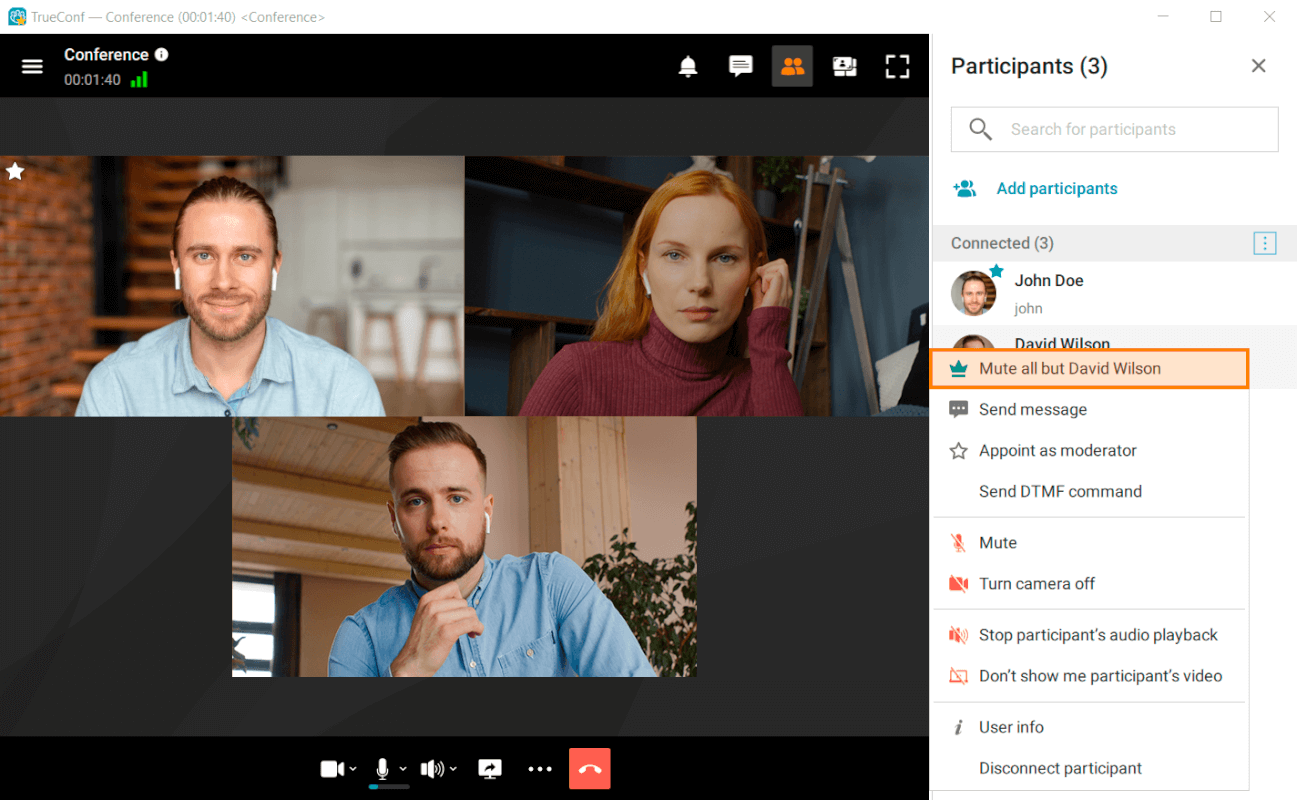
This command will unmute the microphone of the selected participant, while other participants’ microphones will be muted.
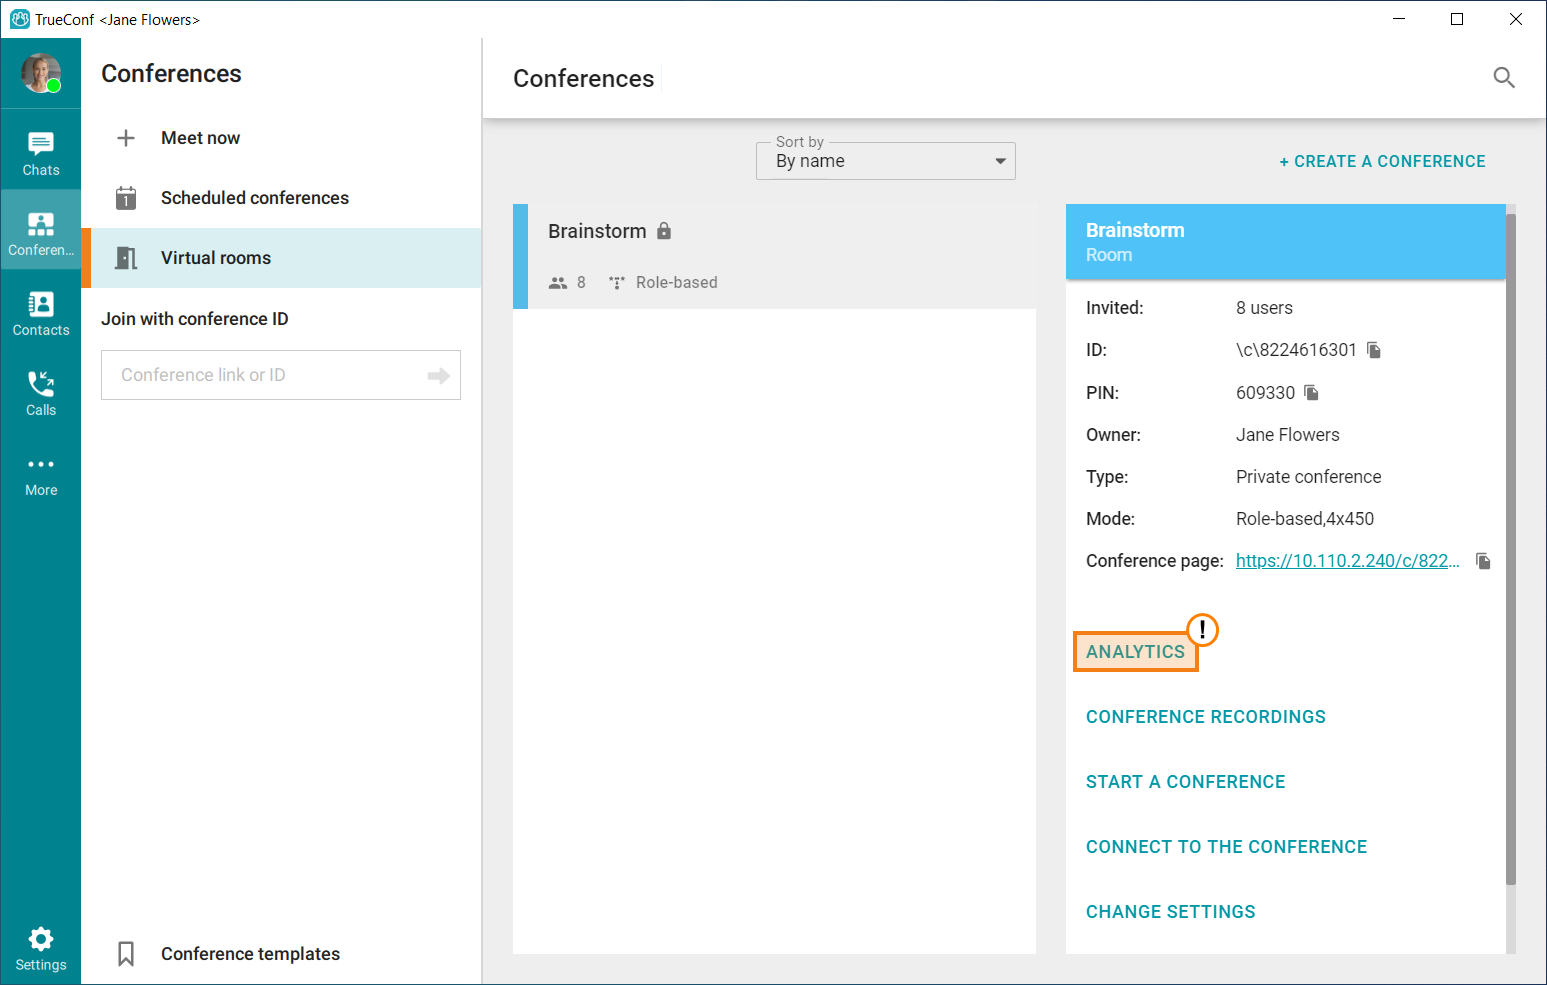
# Conference analytics
The conference owner can check detailed information about participants and their activity during the event. To do it, you will need to:
Click on the
 button in the application menu to access the Conferences section.
Select the list of conferences depending their start mode: Scheduled conferences or Virtual rooms.
Click on the conference for which you want to check the analytics.
Click on the Analytics button in the conference card.
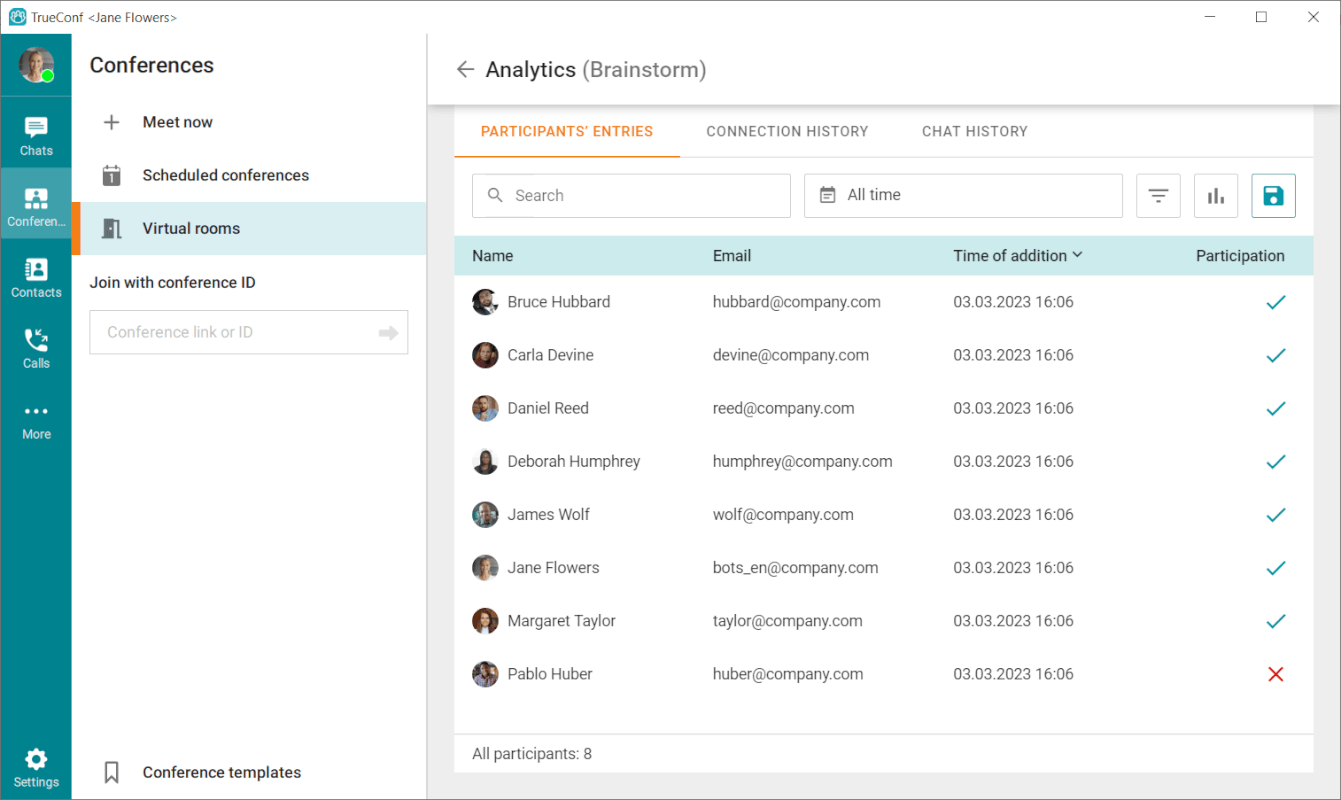
In the analytics section, you will be able to check the following data:
Information about participants
Connection history
Messages sent to the common chat.
It is also possible to search within these data and apply filters. If necessary, any list can be saved to a csv file. To do it, click on the  button.
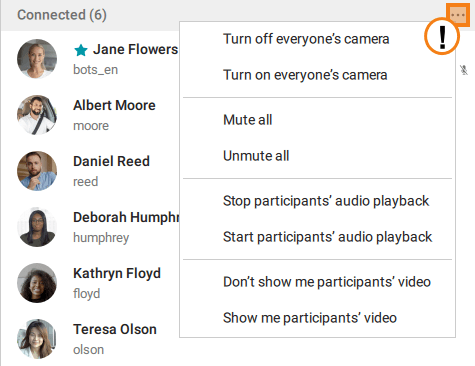
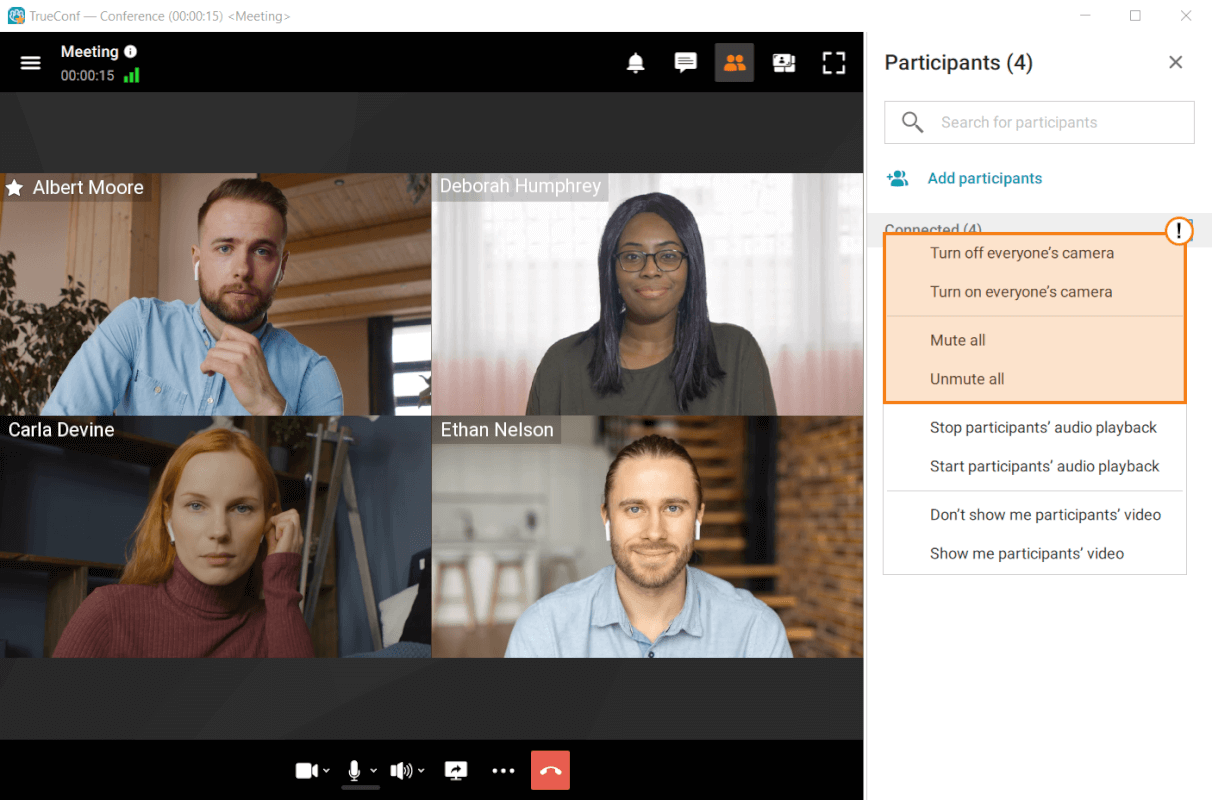
# Managing participants' AV devices
During a conference a moderator can control participants’ audio and video devices. To do it, take these steps:
Click on the
in the upper right corner of the conference window.You will open the list of participants. Right-click on the selected user.
The context menu will include multiple options for controlling the participant’s devices.
It is also possible to control the devices of all participants. Click on the button in the upper right corner of the list and select the required option in the context menu:
It is also possible to fine-tune participants’ devices (select the appropriate camera or microphone or control the microphone gain). To do it, go to the real-time meeting management section and follow the steps described in TrueConf Server user guide.
# Managing the display of participant screens in a conference
The moderator also has the ability to end screen sharing by other participants at any time. To do this, they need to right-click on the window with the shared content and select the End content sharing option.
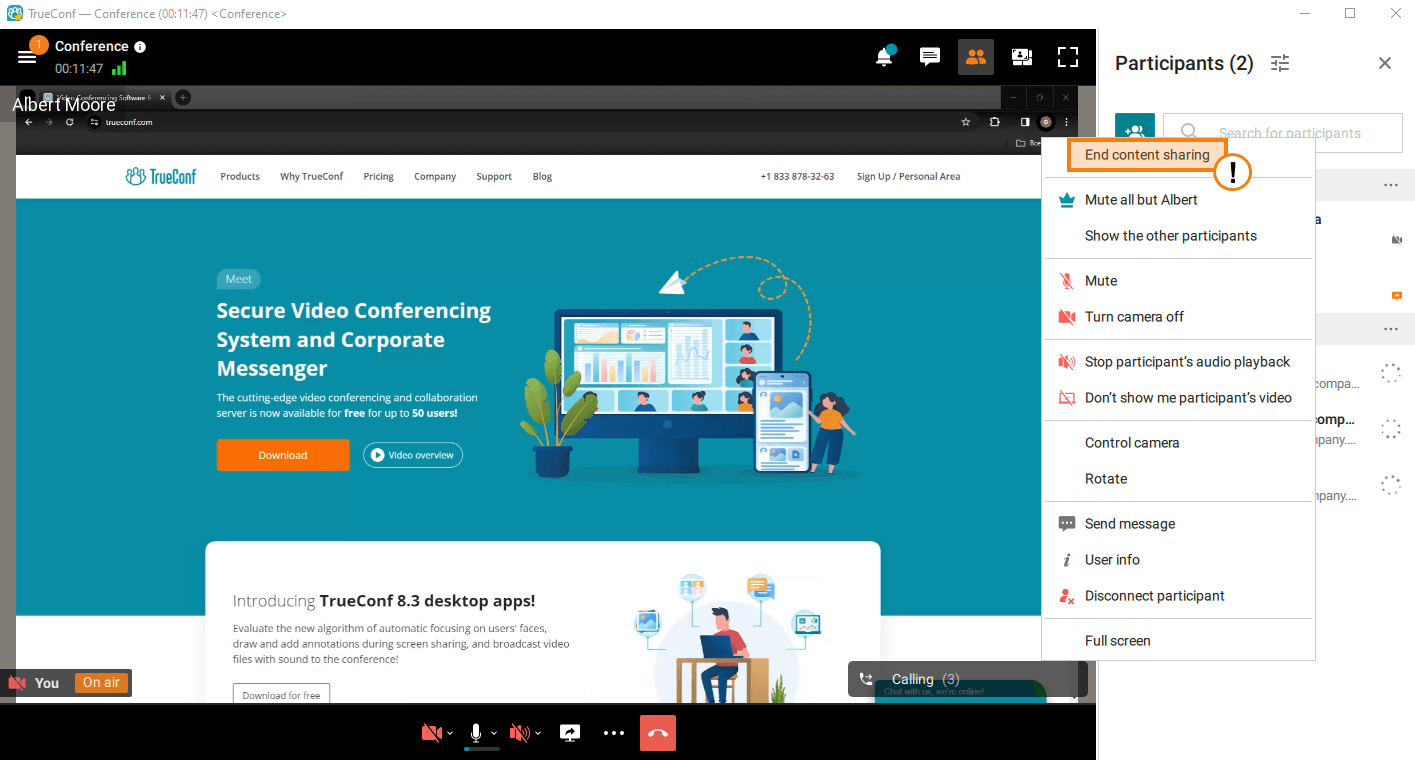
The participant whose broadcast was terminated will receive a notification "The moderator has ended the broadcast of your content."
# Changing the conference PIN and ID on the fly
During the conference, the moderator can change its PIN and ID (unique identifier). This can be useful to further secure the conference against unauthorized access after connecting the invited participants. This can be done in two ways. The first:
Go to the real-time meeting management.
Click on the button
 .
.Select the required option and specify the new PIN or ID. It is possible to automatically generate a PIN and set a new one if it was not specified before. Additionally, you can delete the PIN.
The owner can change the PIN of a conference even without joining it (without being included in the list of participants). The corresponding option will be available in the conference card when selecting this event in the list of meetings either in the client application scheduler or in the personal area.
Second:
During the conference, press Conference settings
 .
.In the opened window, press the Edit button.
Replace the existing data with the required information and press Save.
# Conference Extension
If the option to extend the conference was enabled when scheduling a planned conference, all moderators will be able to increase the duration of the event. This can be done in two ways through real-time meeting management:
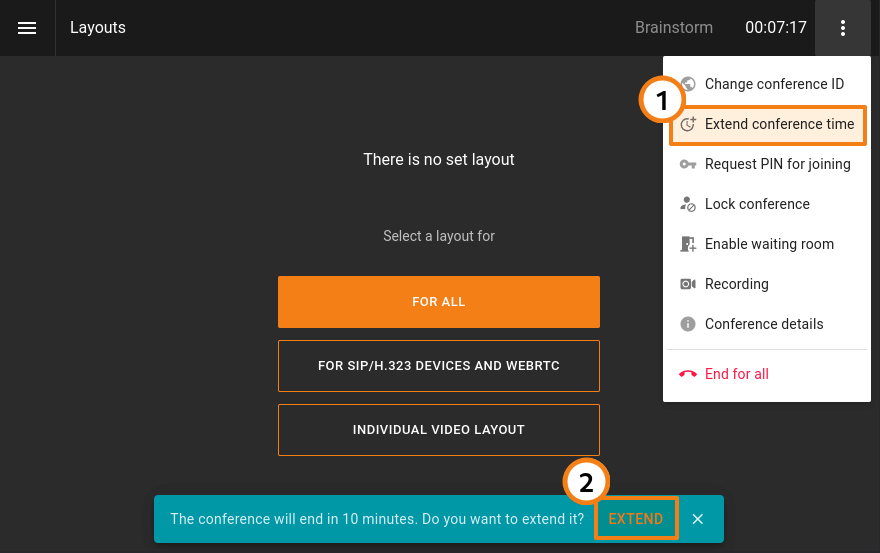
In the top right corner, press the
button and select the Extend conference time option.If the option for notification about the upcoming end of the event was also activated, an alert with the Extend button will be displayed at the bottom of the control window.
# Locking the conference
A moderator can lock the conference for new participants at any moment. This meeting will be unavailable to new participants either temporarily until it is unlocked or up to its ending.
You can lock a meeting in one of these ways:
Select an ongoing conference in the scheduler and click on the Lock conference button in the conference card
Go to the real-time meeting management section, click on the button
and select Lock conference.
When a conference is locked
it can be joined by:
moderators (including the owner)
operators
users who will be explicitly added by the moderator (including those users who were invited to the meeting, but did not join it).
it cannot be joined by:
authorized server users who were not explicitly added to the list of participants after the conference was locked
users who were added to the list of invited participants before the conference started, but did not connect before the conference was locked
guests (in case of a public conference).
Each time when a conference ends, its access status is automatically set to the default value unlocked.
You can make a conference accessible to new participants in the same section where the conference was locked. Select the option Unlock conference in the conference card.
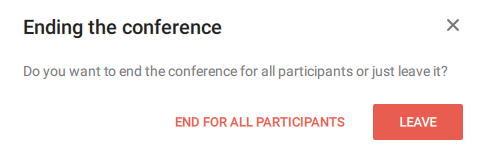
# Ending the conference
If you are the conference moderator, when you leave the conference (by pressing  ) you will be asked whether you want to leave the conference or end the conference for all participants.
If you choose Leave (without ending it for everyone), you can re-join it in the following ways:
- Call its ID or join URL
If you are the owner, you will only need to create a new conference. The application will automatically redirect you to the conference where you are the owner (if at least one participant still remains in the meeting).